
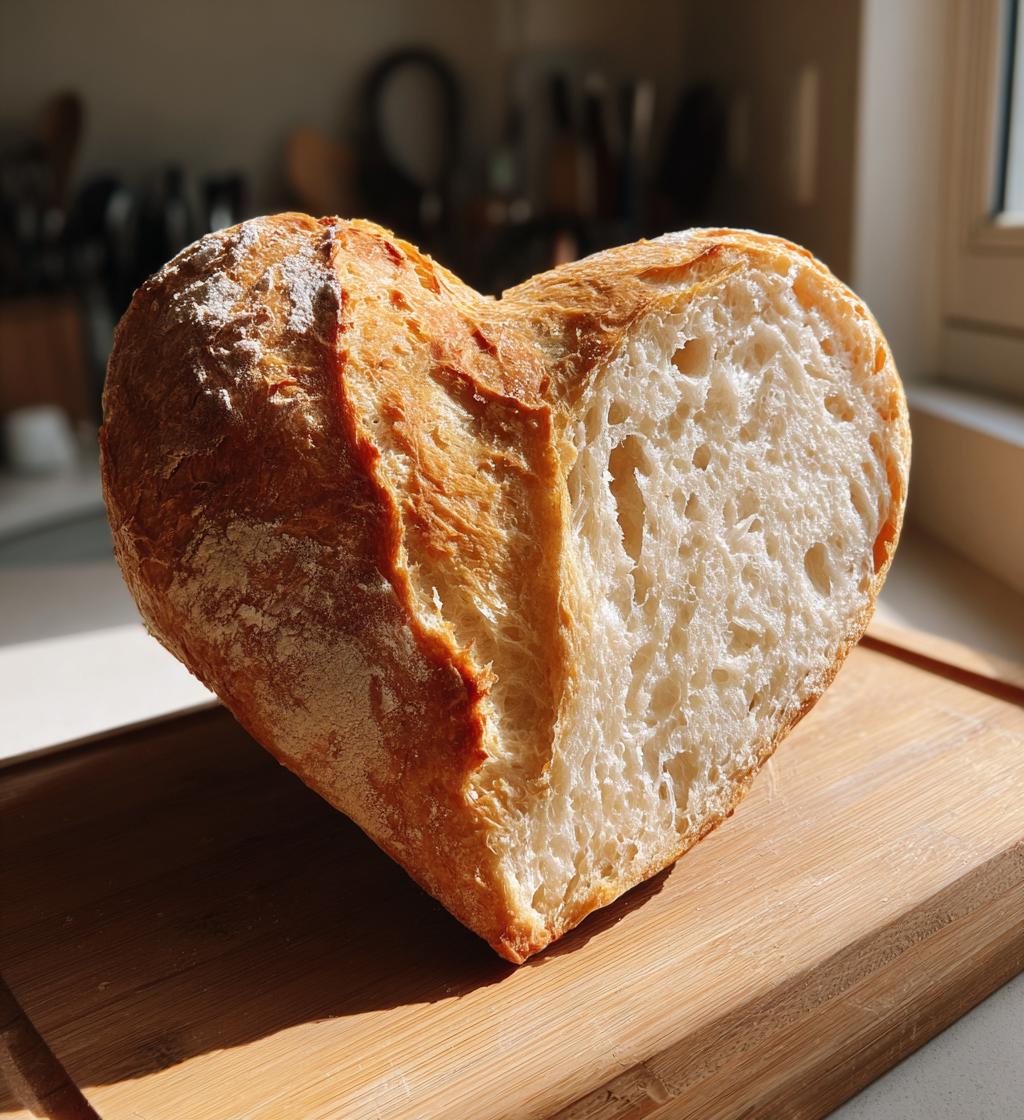
Valentine’s Day is all about love, and what better way to express those warm feelings than through the delightful art of baking? There’s something so magical about creating homemade treats, especially when they’re shaped like hearts! My special *Valentine’s bread* recipe is perfect for sharing with your loved ones. Picture this: the cozy aroma of freshly baked bread filling your kitchen, making hearts flutter with excitement. You can slice it up for breakfast in bed or enjoy it as a sweet snack during your romantic dinner. Trust me, nothing says “I care” quite like a loaf of warm, tender bread that you made yourself. It’s not just about the taste; it’s about the love and effort you put into each knead, each rise, and each heart-shaped twist. So, roll up your sleeves and let’s get baking some love this Valentine’s Day!
Ingredients List
Here’s what you’ll need to whip up this delightful *Valentine’s bread*. Each ingredient plays a crucial role in creating the perfect loaf, so let’s dive in!
- 3 cups all-purpose flour: This is the backbone of your bread. Make sure it’s measured accurately for the best texture – too much flour can lead to a dense loaf.
- 1 packet active dry yeast (about 2 1/4 teaspoons): This little packet is what helps your bread rise and gives it that lovely airy texture. Fresh yeast is key, so check the expiration date!
- 1 cup warm water: Temperature matters here! You want it warm to the touch, around 100°F (38°C), to help activate the yeast without killing it.
- 1/4 cup sugar: This adds sweetness and helps feed the yeast for a good rise. Feel free to adjust slightly if you prefer less sweetness.
- 1/4 cup olive oil: This gives your bread moisture and a touch of richness. It also helps keep the bread soft.
- 1 teaspoon salt: Essential for flavor! Salt enhances all the other tastes in the bread.
- 1 teaspoon vanilla extract: A surprise ingredient that adds a lovely hint of sweetness and depth to the flavor profile.
Gather these ingredients, and let’s make something special together!
How to Prepare Valentine’s Bread
Now that you’ve gathered all your ingredients, it’s time to roll up your sleeves and bring this *Valentine’s bread* to life! Follow these easy steps, and I promise you’ll end up with a beautifully heart-shaped loaf that’s bursting with love.
Step-by-Step Instructions
Start by mixing the warm water and active dry yeast in a medium bowl. Let it sit for about 5 minutes until it’s frothy – this means your yeast is alive and ready to work its magic! If it doesn’t foam up, your yeast might be old, so double-check that packet.
Once your yeast is bubbly, add the sugar, olive oil, vanilla extract, and salt to the bowl. Give it a good stir to combine everything. Next, it’s time to add the flour gradually. I recommend adding about a cup at a time, mixing well after each addition until a soft dough starts to form. If the dough feels too sticky, don’t hesitate to sprinkle a bit more flour in – we want it to be just right!
Now comes the fun part: kneading! Transfer your dough to a floured surface and knead it for about 10 minutes. You’ll know it’s ready when it’s smooth and elastic. This step is crucial as it develops the gluten, giving your bread that delightful texture.
After kneading, place your dough in a greased bowl, cover it with a clean kitchen towel, and let it rise in a warm spot for about 1 hour. It should double in size, so be patient! Once it’s risen, punch it down gently to release the air, then shape it into a heart. Don’t worry if it’s not perfect; love is in the imperfections!
Transfer your heart-shaped dough to a baking sheet lined with parchment paper. Cover it again and let it rise for another 30 minutes. Preheat your oven to 350°F (175°C) while you wait, so it’s hot and ready to bake your lovely creation. Once the dough has puffed up nicely, pop it in the oven for 25-30 minutes, or until golden brown. You’ll know it’s done when it sounds hollow when tapped on the bottom.
Let it cool a bit before slicing – as tempting as it is to dive in right away, this helps with texture and makes it easier to cut. And there you have it, your very own *Valentine’s bread* ready to share with someone special!
Why You’ll Love This Recipe
You’ll absolutely adore making this *Valentine’s bread* for so many reasons. Here are just a few that make this recipe special:
- Easy to Make: Even if you’re a beginner, the step-by-step instructions will guide you through the process, making it approachable for everyone.
- Delicious Flavor: The unique combination of ingredients, especially the hint of vanilla, creates a subtly sweet and delightful taste with every bite.
- Heartfelt Sharing: Baking this bread is a wonderful way to show your love. Whether it’s for a partner, friends, or family, the joy of sharing homemade bread is truly special.
- Customizable: Feel free to decorate it with icing or sprinkles for an extra festive touch, making it perfect for any Valentine’s celebration!
Tips for Success
To ensure your *Valentine’s bread* turns out perfectly, here are some pro tips that’ll make a world of difference:
- Check Your Yeast: Always make sure your yeast is fresh! If it doesn’t bubble up after mixing with warm water, it’s time to get a new packet.
- Don’t Rush the Rise: Allowing the dough to rise properly is crucial. If your kitchen is cool, try placing the bowl in a slightly warm oven (turned off) to create a cozy environment for the yeast.
- Knead with Love: Kneading is where the magic happens! Make sure you knead for the full 10 minutes, as this develops the gluten needed for that perfect texture.
- Perfect Shaping: Don’t stress if your heart shape isn’t exact. Embrace the imperfections; they’re what make it handmade and special!
- Cool Before Cutting: Let the bread cool for at least 10 minutes before slicing. This helps maintain its structure and keeps it from becoming gummy.
Nutritional Information
Here’s the estimated nutritional breakdown for one slice of *Valentine’s bread*. Keep in mind that these values may vary depending on the specific ingredients you use and portion sizes:
- Calories: 150
- Sugar: 5g
- Sodium: 150mg
- Fat: 4g
- Saturated Fat: 0.5g
- Unsaturated Fat: 3.5g
- Trans Fat: 0g
- Carbohydrates: 28g
- Fiber: 1g
- Protein: 4g
- Cholesterol: 0mg
These values can help you keep track of your nutrition while enjoying this delightful bread. Happy baking!
FAQ Section
Here are some common questions I often hear about making *Valentine’s bread*. I hope these answers help you on your baking journey!
- Can I use whole wheat flour? Absolutely! Whole wheat flour will give your *Valentine’s bread* a nutty flavor and added health benefits. Just keep in mind it may slightly change the texture.
- How do I know when my bread is done baking? The best way to check is to tap the bottom; it should sound hollow. You can also use an instant-read thermometer – a perfect loaf should be around 190°F (88°C).
- Can I make this ahead of time? Yes! You can prepare the dough and let it rise, then punch it down and shape it into a heart. Just cover it tightly and refrigerate overnight before the second rise.
- What’s a good way to decorate my bread? A simple icing made from powdered sugar and milk drizzled over the top adds a lovely touch. You can also sprinkle some colorful sprinkles for a festive flair!
Storage & Reheating Instructions
To keep your *Valentine’s bread* fresh, store any leftovers in an airtight container at room temperature. This will help maintain its soft texture for up to three days. If you want to keep it longer, consider wrapping it tightly in plastic wrap and freezing it. It can last for up to three months in the freezer!
When you’re ready to enjoy it again, simply thaw at room temperature for a few hours. For a warm, fresh-out-of-the-oven taste, pop slices in the toaster or microwave for a few seconds. Trust me, you’ll love that warm, cozy feeling it brings back!
Print
Valentine’s Bread: 7 Heartfelt Steps to Bake with Love
A special bread recipe for Valentine’s Day, perfect for sharing.
- Total Time: 1 hour 50 minutes
- Yield: 1 loaf 1x
Ingredients
- 3 cups all-purpose flour
- 1 packet active dry yeast
- 1 cup warm water
- 1/4 cup sugar
- 1/4 cup olive oil
- 1 teaspoon salt
- 1 teaspoon vanilla extract
Instructions
- Mix warm water and yeast in a bowl. Let it sit for 5 minutes.
- Add sugar, olive oil, vanilla extract, and salt to the yeast mixture.
- Gradually add flour, mixing until a dough forms.
- Knead the dough on a floured surface for 10 minutes.
- Place the dough in a greased bowl and cover. Let it rise for 1 hour.
- Punch down the dough and shape it into a heart.
- Place on a baking sheet and let it rise for another 30 minutes.
- Bake at 350°F (175°C) for 25-30 minutes.
- Let it cool before serving.
Notes
- Use whole wheat flour for a healthier option.
- Decorate with icing for a festive touch.
- Store in an airtight container for freshness.
- Prep Time: 20 minutes
- Cook Time: 30 minutes
- Category: Baking
- Method: Baking
- Cuisine: American
- Diet: Vegetarian
Nutrition
- Serving Size: 1 slice
- Calories: 150
- Sugar: 5g
- Sodium: 150mg
- Fat: 4g
- Saturated Fat: 0.5g
- Unsaturated Fat: 3.5g
- Trans Fat: 0g
- Carbohydrates: 28g
- Fiber: 1g
- Protein: 4g
- Cholesterol: 0mg
Keywords: valentines bread, heart-shaped bread, romantic baking