
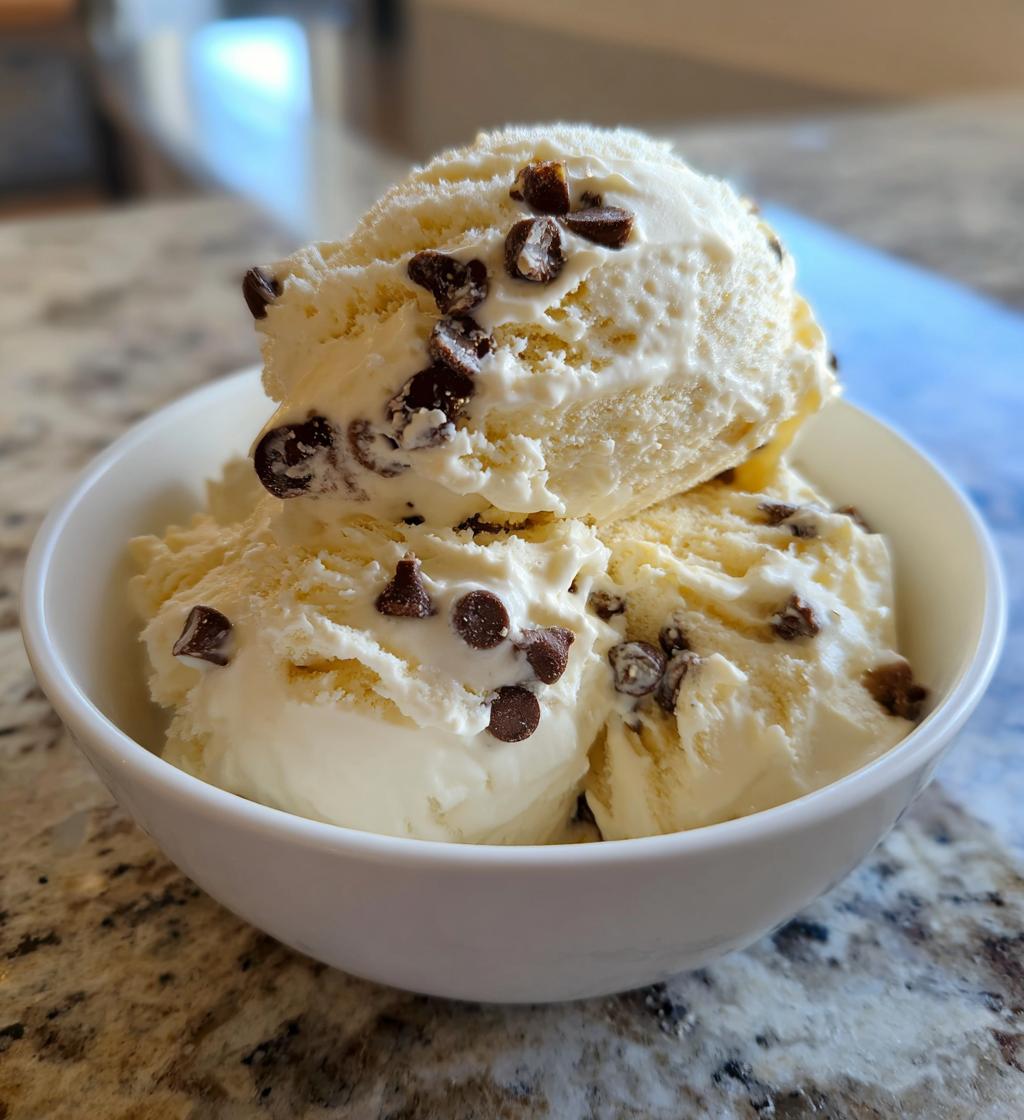
Oh, summer! It’s the season that brings sunshine, laughter, and, of course, the joy of homemade ice cream! There’s nothing quite like the feeling of whipping up a batch of creamy ice cream in your own kitchen. This recipe is a breeze to make and will have you cooling off in no time. I remember those long, hot afternoons spent at my grandmother’s house, where we’d churn ice cream together, laughter echoing around the kitchen as we waited for the magic to happen. The moment we’d finally scoop it out, the rich, velvety texture melting on our tongues was pure bliss. Trust me, there’s something incredibly satisfying about creating your own flavors. Whether you’re lounging by the pool or having a backyard barbecue, this ice cream is the perfect refreshment. Plus, it’s wonderfully customizable! You can toss in some chocolate chips or even fresh fruit. So gear up for summer, grab your ice cream maker, and get ready to create a creamy, refreshing treat that you’ll want to enjoy all season long!
Ingredients for Ice Cream Homemade Summer
To whip up this delightful homemade ice cream, you’ll need just a few simple ingredients that come together beautifully. Here’s what you’ll need:
- 2 cups heavy cream
- 1 cup whole milk
- 3/4 cup granulated sugar
- 1 teaspoon pure vanilla extract
- 1/2 cup chocolate chips (if desired)
These ingredients are all about freshness and quality. I always recommend using the best heavy cream you can find because it makes a world of difference in creaminess. And don’t skimp on the vanilla – pure extract brings a warm, inviting flavor that really shines through. If you’re feeling adventurous, those chocolate chips are totally optional, but trust me, they add a delightful surprise in every scoop! Enjoy gathering these goodies, and let’s get ready to make some delicious ice cream!
How to Prepare Ice Cream Homemade Summer
Making homemade ice cream is simpler than you might think, and I’m here to guide you through each step! Let’s dive right into the magic of ice cream making.
Step-by-Step Instructions
First, grab a mixing bowl and combine the heavy cream, whole milk, and granulated sugar. This step is crucial, so whisk the mixture until the sugar dissolves completely—this usually takes about a minute or two. Next, add in that pure vanilla extract and mix it well. The aroma will make your kitchen smell heavenly!
If you’re feeling a bit indulgent, now’s the time to fold in the chocolate chips. Just gently incorporate them so they’re evenly distributed, adding a delightful surprise to your creamy treat. Once that’s done, pour the mixture into your ice cream maker. Follow the manufacturer’s instructions for churning, which usually takes around 20 to 30 minutes. You’ll want to keep an eye on it as it thickens—don’t miss that glorious transformation!
After churning, transfer your ice cream to a container and make sure it’s airtight. Pop it in the freezer for at least 4 hours to firm up. I know the waiting is tough, but trust me—it’s worth it!
Tips for Using an Ice Cream Maker
When using an ice cream maker, make sure your machine is prepped ahead of time. Some machines require the bowl to be frozen overnight, so check your instructions! During churning, keep an eye on the consistency; you want it to resemble soft serve before freezing. If it gets too hard in the machine, it can become difficult to scoop later, so aim for that perfect creamy texture. And remember, patience is key—allowing it to freeze fully ensures that each scoop is smooth and luscious!
Why You’ll Love This Recipe
This homemade ice cream recipe isn’t just a treat; it’s a game changer for your summer gatherings! Here’s why you’ll be head over heels for making this at home:
- Quick Preparation: You can get this delicious ice cream ready in just 15 minutes of prep time! Perfect for those spontaneous summer cravings.
- Easy Ingredients: With just five simple components, you won’t need to hunt down anything fancy. It’s all about fresh, quality staples you probably already have!
- Creamy Texture: The combination of heavy cream and whole milk creates an irresistibly smooth and rich texture that melts in your mouth. Trust me, it’s absolutely divine!
- Customizable Flavors: Feeling adventurous? You can easily mix in your favorite add-ins like fruit, nuts, or different flavor extracts. The possibilities are endless!
- Perfect for Any Occasion: Whether it’s a hot day by the pool, a backyard barbecue, or a cozy evening at home, this ice cream fits right in. Everyone will love it!
Seriously, once you taste the difference of homemade versus store-bought, you’ll be hooked! Let’s make this summer one to remember with your own delicious ice cream creations!
Nutritional Information
Let’s talk about what’s in this delightful homemade ice cream! Each serving is packed with flavor and a few nutritional facts to keep in mind. Here’s the estimated nutritional breakdown per serving (about 1/2 cup):
- Calories: 300
- Fat: 20g
- Saturated Fat: 12g
- Unsaturated Fat: 8g
- Trans Fat: 0g
- Cholesterol: 80mg
- Sodium: 50mg
- Carbohydrates: 30g
- Fiber: 0g
- Sugar: 25g
- Protein: 4g
Keep in mind that these values are estimates, and can vary based on the specific ingredients you use. But no matter the numbers, one thing’s for sure—this ice cream is a fantastic treat for those hot summer days! Enjoy every creamy, luscious scoop!
FAQ Section
Got questions about making your own ice cream at home? Don’t worry, I’ve got you covered! Here are some common queries that come up, especially when it comes to whipping up this delicious homemade ice cream for summer.
Can I make this without an ice cream maker?
Absolutely! If you don’t have an ice cream maker, you can still create a creamy treat. After mixing your ingredients, pour the mixture into a shallow dish, like a metal baking pan. Freeze it for about 30 minutes, then take it out and stir it vigorously with a fork to break up any ice crystals. Repeat this process every 30 minutes for about 2-3 hours until it’s nicely frozen and creamy. It’s a bit more work, but it’s totally doable!
How long does it take to freeze?
After churning in your ice cream maker, you’ll want to transfer the mixture to a container and let it freeze for at least 4 hours. This step is essential for achieving that perfect scoopable consistency. I know waiting can be tough, but it’s worth it for that smooth, creamy result!
What can I add for flavor variations?
The exciting part about homemade ice cream is how easy it is to customize! You can add all kinds of delicious ingredients. Some of my favorites include:
- Fresh fruits: Strawberries, blueberries, or peaches add a refreshing twist.
- Nuts: Chopped pecans or toasted almonds give a nice crunch.
- Flavor extracts: Experiment with almond, mint, or even coffee for unique flavors.
- Mix-ins: Try crushed cookies, candy pieces, or even swirls of caramel or fudge!
Just remember to fold these in gently after mixing the base, and have fun creating your own delicious combinations!
Storage & Reheating Instructions
Storing your homemade ice cream properly is key to keeping it fresh and delicious. After you’ve churned and frozen your ice cream, transfer it into an airtight container. This step is crucial because it prevents ice crystals from forming and keeps your ice cream creamy. I love using a container with a tight-fitting lid to ensure no air gets in – it makes all the difference!
When you’re ready to enjoy your ice cream, make sure to let it sit at room temperature for about 5-10 minutes before scooping. This little wait helps soften the ice cream, making it easier to scoop out those perfect portions. No one wants to wrestle with a hard block of ice, right?
If you have leftovers (which I’m sure you will!), keep it stored in the freezer. Just remember to close the lid tightly after each use to maintain that fresh flavor and texture. Homemade ice cream can typically last for about two weeks in the freezer, but trust me, it’s so good you might not have any left by then!
And just a little tip: if you notice any ice crystals forming on top when you take it out of the freezer, just give it a quick stir before serving. It’ll help restore that smooth, luscious consistency. Happy scooping!
Serving Suggestions
Now that you’ve created this delightful homemade ice cream, let’s talk about how to elevate your summer dessert experience! The beauty of this ice cream is that it pairs wonderfully with all sorts of delicious accompaniments. Here are some of my favorite serving suggestions that will make your treat even more special:
- Fresh Fruits: A scoop of your homemade ice cream goes hand-in-hand with slices of fresh strawberries, peaches, or blueberries. Their natural sweetness and juiciness complement the creamy texture perfectly!
- Cookies: Who can resist the classic combo of ice cream and cookies? Whether it’s a warm chocolate chip cookie or a crunchy biscotti, they make a delightful pairing. You could even sandwich your ice cream between two cookies for DIY ice cream sandwiches!
- Chocolate or Caramel Sauce: Drizzling some rich chocolate or gooey caramel sauce over your ice cream adds an irresistible touch. You can warm the sauces slightly for that melty goodness that just enhances the experience!
- Nuts: Tossing on some toasted almonds or chopped pecans adds a lovely crunch and a nutty flavor that contrasts beautifully with the soft creaminess of the ice cream.
- Whipped Cream: A dollop of freshly whipped cream on top is always a hit! It adds an airy lightness that makes each bite feel indulgent.
- Sprinkles or Candy Pieces: For a fun and festive touch, sprinkle some colorful sprinkles or crushed candy pieces on top. It’s a great way to bring a smile to kids and adults alike!
Feel free to mix and match these ideas to create your ultimate ice cream sundae or dessert platter! The best part is that you can let your creativity shine. Enjoy your homemade ice cream in style, and don’t forget to share your delicious creations with friends and family!
Call to Action
Now that you’ve enjoyed making this dreamy homemade ice cream, I’d love to hear from you! Did you try any fun flavor combinations? Maybe you added a twist that I didn’t mention? Please, share your experiences in the comments below. It’s always exciting to see how everyone puts their own spin on this recipe!
Also, if you loved this recipe, consider giving it a rating! Your feedback not only warms my heart but also helps others find this creamy delight. So go ahead, let’s start a conversation about all things ice cream! And don’t forget to share this recipe with friends and family—because summer is better when we all have a scoop (or two) of homemade goodness. Happy ice cream-making, everyone!
Print
Ice Cream Homemade Summer: 5 Steps to Blissful Treats
This homemade ice cream is perfect for summer. It’s creamy, refreshing, and easy to make.
- Total Time: 4 hours 15 minutes
- Yield: 4 servings 1x
Ingredients
- 2 cups heavy cream
- 1 cup whole milk
- 3/4 cup granulated sugar
- 1 teaspoon pure vanilla extract
- 1/2 cup chocolate chips (optional)
Instructions
- In a mixing bowl, combine heavy cream, whole milk, and sugar.
- Whisk until the sugar dissolves.
- Add vanilla extract and mix well.
- If using, fold in chocolate chips.
- Pour the mixture into an ice cream maker.
- Churn according to the manufacturer’s instructions.
- Transfer to a container and freeze for at least 4 hours before serving.
Notes
- Use fresh ingredients for the best flavor.
- Store the ice cream in an airtight container.
- Let it sit at room temperature for a few minutes before scooping.
- Prep Time: 15 minutes
- Cook Time: 0 minutes
- Category: Dessert
- Method: Ice Cream Maker
- Cuisine: American
- Diet: Vegetarian
Nutrition
- Serving Size: 1/2 cup
- Calories: 300
- Sugar: 25g
- Sodium: 50mg
- Fat: 20g
- Saturated Fat: 12g
- Unsaturated Fat: 8g
- Trans Fat: 0g
- Carbohydrates: 30g
- Fiber: 0g
- Protein: 4g
- Cholesterol: 80mg
Keywords: ice cream homemade summer