
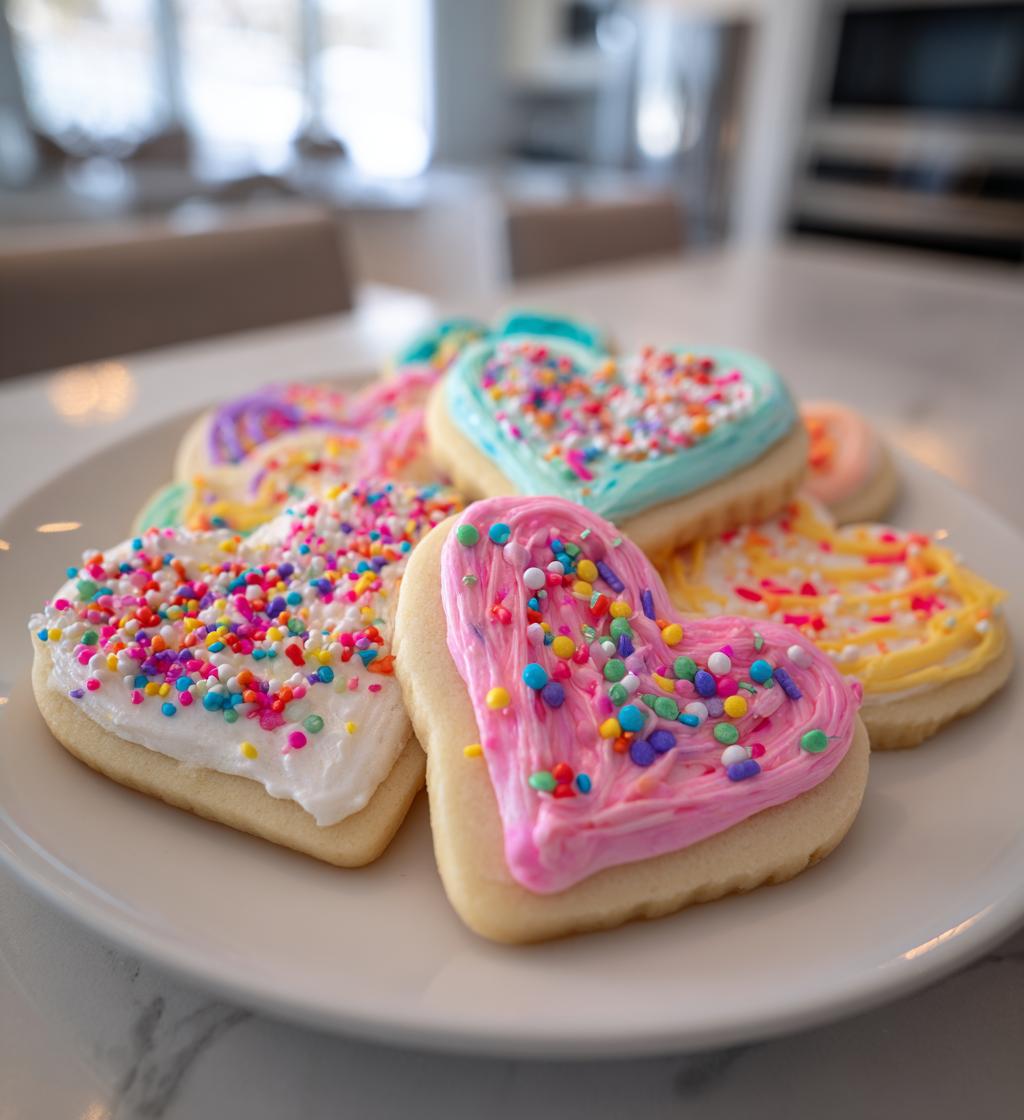
There’s something truly magical about gathering with friends and family to create beautiful cookies for Valentine’s Day, don’t you think? I mean, nothing beats the laughter and joy that fills the kitchen as we roll out dough, cut out fun shapes, and unleash our inner artists with colorful royal icing. I can still remember the first time I hosted a cookie decorating class—it felt like a party! Everyone brought their creativity to the table, and we ended up with the most delightful array of hearts, flowers, and even quirky animals. The best part? Watching the smiles on my loved ones’ faces as they presented their decorated cookies made with love.
Whether you’re a seasoned baker or a newbie, this valentines cookie class is all about having fun and letting your imagination run wild. Plus, you’ll walk away with sweet treats to share with those special people in your life. Trust me, there’s nothing like gifting a beautifully decorated cookie made by hand. So, grab your loved ones, roll up your sleeves, and get ready to celebrate love in the sweetest way possible!
Ingredients List
To make these delightful Valentine’s cookies, you’ll need the following ingredients:
- 2 cups all-purpose flour
- 1 cup unsalted butter, softened (make sure it's at room temperature for easy mixing!)
- 1 cup granulated sugar
- 1 large egg
- 1 teaspoon vanilla extract
- 1/2 teaspoon baking powder
- 1/2 teaspoon salt
- Royal icing (enough to decorate your cookies—about 2-3 cups should do, depending on how creative you want to get!)
- Food coloring (your choice—get ready to make those cookies pop!)
- Sprinkles (because who doesn’t love a little sparkle on their cookies?)
These ingredients come together to create a cookie base that’s not only delicious but also perfect for decorating. So gather everything, and let’s make some sweet memories!
How to Prepare Instructions
Alright, let’s get those cookies baking! Follow these straightforward steps, and you’ll have a batch of delicious cookies ready for decorating in no time. Trust me, it’s easier than you might think!
- First things first, preheat your oven to 350°F (175°C). This ensures your cookies bake evenly and come out just right.
- In a large mixing bowl, cream together the softened butter and granulated sugar. Use a hand mixer or a sturdy wooden spoon to beat them until the mixture is light and fluffy—about 2-3 minutes should do the trick.
- Next, add in the egg and vanilla extract. Beat them until fully incorporated, and don’t be shy! This is where your cookie base starts to come together.
- In a separate bowl, whisk together the flour, baking powder, and salt. This step is crucial because it helps evenly distribute the leavening agent, ensuring your cookies rise beautifully.
- Now, gradually add the dry mixture to the wet ingredients, mixing until just combined. Don’t overmix here—just until you don’t see any flour streaks. You want a soft dough, not a workout!
- Once your dough is ready, turn it out onto a floured surface and roll it out to about 1/4 inch thick. Use your favorite cookie cutters to cut out fun shapes. Hearts and flowers are perfect for Valentine’s Day!
- Carefully place the cut-out cookies on a baking sheet lined with parchment paper. Make sure to leave a little space between each cookie to allow for spreading.
- Pop those beauties into the oven and bake for 10-12 minutes. Keep an eye on them—they should be lightly golden around the edges when done.
- Once baked, take them out and let them cool on the baking sheet for a few minutes before transferring them to a wire rack. Let the cookies cool completely before you dive into decorating. This is super important to prevent the icing from melting!
- While the cookies are cooling, prepare your royal icing and add food coloring as desired. Get ready to unleash your creativity!
- Finally, it’s time to decorate! Use the royal icing and any sprinkles you have on hand to make those cookies as festive and fun as possible.
And there you have it! Follow these steps, and you’ll create a batch of cookies that are not only delicious but also a joy to decorate! Can’t wait to see your creations!
Why You’ll Love This Recipe
This valentines cookie class is more than just baking; it’s an experience filled with laughter, creativity, and love! Here’s why you’ll absolutely adore this cookie decorating adventure:
- Fun for Everyone: Whether you’re a baking pro or a total beginner, this class is all about enjoying the process together. You’ll share giggles and good times while creating something beautiful!
- Easy to Follow: The step-by-step instructions make it simple and stress-free. You won’t feel overwhelmed, and you can focus on having fun rather than worrying about making mistakes.
- Perfect for Any Skill Level: Everyone can join in on the fun! Kids, teens, and adults alike will find joy in decorating cookies, making it a fantastic family activity.
- Beautiful Results: You’ll be amazed at how gorgeous your cookies turn out, even if it’s your first time. Everyone loves a beautifully decorated cookie, and you’ll be proud to share them with loved ones!
- Creative Expression: This class encourages you to unleash your artistic side! Play with colors, shapes, and designs to make cookies that reflect your personality and style.
- Sweet Memories: The joy of creating cookies together will leave you with wonderful memories to cherish. Trust me, the smiles and satisfaction are the best part of this whole experience!
So, get ready to roll up your sleeves and dive into a world of sweet creativity. You’ll be so glad you did!
Tips for Success
To ensure your Valentine’s cookies turn out as delightful as they are meant to be, I’ve gathered some expert tips and tricks just for you! These little nuggets of wisdom will help you avoid common pitfalls and achieve icing perfection.
Chill the Dough
If your dough feels too soft or sticky, don’t hesitate to pop it in the fridge for about 30 minutes. Chilling the dough makes it easier to roll out and helps the cookies hold their shape while baking.
Don’t Skip the Cooling Time
This one’s crucial! Let your cookies cool completely before you start decorating. If they’re even a little warm, the icing will melt away, and you’ll be left with a gooey mess instead of a masterpiece. Patience is key here!
Royal Icing Consistency
When making royal icing, aim for the right consistency—think toothpaste! It should be thick enough to hold its shape when piped but still smooth enough to spread. You can adjust it by adding a bit of water or powdered sugar as needed.
Practice Your Piping
If you’re new to piping, practice on parchment paper before tackling your cookies. This way, you’ll get a feel for how much pressure to apply and how to control the icing flow. No one has to know if you had a little practice run!
Layer Your Designs
Try decorating in layers! Start with a base color, let it dry for a bit, and then add details on top. This method adds depth to your designs and gives you a chance to experiment with different colors and patterns without making a mess.
Have Fun with Sprinkles
Don’t hold back on the sprinkles! They add a fun, festive touch to your cookies. Just be sure to add them while the icing is still wet so they stick properly—otherwise, they’ll just roll off like confetti!
Keep It Simple
Especially for your first time, keep your designs simple. You can always add more details later. Trust me, some of the best cookies are those that embrace a minimalist style, making them chic and easy to achieve!
With these tips in your back pocket, you’ll be well on your way to creating beautiful, delicious cookies that will impress everyone. Get excited, and let’s decorate to our heart’s content!
Variations
One of the best parts about a valentines cookie class is the chance to get creative! Personalizing your cookies is not just fun; it adds a special touch that makes each cookie uniquely yours. Here are some delightful variations to consider:
Different Shapes
Sure, hearts and flowers are classic, but why stop there? Use cookie cutters to create a variety of shapes like stars, butterflies, or even cute animals! You can even make mini cookies for a fun assortment on a platter. Just imagine a whole garden of cookie flowers or a whimsical animal-themed treat box!
Flavor Twists
While vanilla is a beloved choice, why not switch things up? Experiment with different extracts such as almond or lemon to give your cookies a delightful twist! Adding a teaspoon of cocoa powder can turn part of the dough into chocolate cookies—perfect for mixing and matching with your icing designs!
Colorful Icing Techniques
Get playful with your royal icing! Try using different piping tips to create unique textures and designs. You can also experiment with marbling techniques by swirling two colors together for a stunning effect. Or, you might want to try flooding your cookies with a base color and adding details once it has dried.
Fun Toppings
Sprinkles are just the beginning! Think about using edible glitter, mini chocolate chips, or even crushed candy canes for a festive touch. You can also try drizzling melted chocolate over your iced cookies for an extra layer of sweetness and visual appeal. The more, the merrier!
Theme it Up!
Consider creating a themed cookie set! How about a whole batch of “love letters” with icing that mimics envelopes or cookies that look like your favorite Valentine’s Day gifts? The possibilities are endless, and it’s a fantastic way to showcase your creativity!
With these variations, you’re bound to make your valentines cookie class an unforgettable experience. So, gather your supplies, let your imagination run wild, and have a blast decorating cookies that are as unique as the love you’re celebrating!
Storage & Reheating Instructions
Once you’ve created your beautiful Valentine’s cookies, you’ll want to make sure they stay fresh for as long as possible! Here’s how to store and enjoy them later:
Storing Your Cookies
Let your cookies cool completely on a wire rack before storing them. This step is super important because it helps prevent any moisture buildup inside the container that could turn your lovely cookies soft!
Once cooled, place your cookies in an airtight container. You can use a simple plastic container or a decorative tin—whatever suits your style! Just make sure to layer them with parchment paper between each layer to prevent sticking. If you’ve used royal icing, let it dry completely before stacking or covering the cookies.
When stored properly, your cookies will stay fresh for about 5-7 days at room temperature. If you want to keep them longer, consider freezing them!
Freezing Cookies
To freeze your cookies, wrap them individually in plastic wrap or foil. Then, place them in a freezer-safe bag or container. This way, they’ll stay fresh for up to 3 months! When you’re ready to enjoy them, just take them out and let them thaw at room temperature for a couple of hours.
Reheating Cookies
If you want to warm up your cookies for that fresh-baked taste, you can pop them in the microwave for about 10-15 seconds. Just be careful not to overdo it, or you’ll end up with a chewy cookie instead of a soft one!
For a nice crisp texture, you can also reheat them in the oven. Preheat your oven to 350°F (175°C), and place the cookies on a baking sheet for about 5 minutes. This way, they’ll be just like they came out of the oven!
With these storage and reheating tips, you’ll be able to savor your Valentine’s cookies and share the love for days to come!
Nutritional Information Section
When it comes to enjoying these delightful Valentine’s cookies, it’s always good to know what you’re indulging in! Here’s a general overview of the nutritional values per cookie. Keep in mind that these are estimates and can vary based on the specific ingredients and brands you use:
- Calories: 150
- Fat: 7g
- Saturated Fat: 4g
- Unsaturated Fat: 2g
- Trans Fat: 0g
- Sodium: 50mg
- Carbohydrates: 20g
- Fiber: 0g
- Sugar: 10g
- Protein: 2g
- Cholesterol: 20mg
These cookies are sure to bring joy, and knowing what’s in them can help you enjoy them even more! So, whether you’re sharing them with loved ones or indulging yourself, you can feel good about your sweet creations!
FAQ Section
Got questions about the valentines cookie class? Don’t worry, I’ve got you covered! Here are some common inquiries I hear, along with answers to help you along your cookie-decorating journey:
Can I substitute ingredients for this recipe?
Absolutely! If you’re out of unsalted butter, you can use salted butter, but just reduce the added salt to a pinch. For the egg, a flax egg (1 tablespoon ground flaxseed mixed with 2.5 tablespoons water) can work in a pinch for a vegan option. And if you don’t have all-purpose flour, you can use a gluten-free blend, but make sure it’s a 1:1 ratio for the best results!
What if I’m a beginner? Any tips?
Don’t sweat it! This class is perfect for beginners. Just remember to take your time, have fun, and enjoy the process. Start with simple designs—maybe just some basic icing and sprinkles. You can always add more details as you feel comfortable. And don’t be afraid to ask for help if you’re unsure; we’re all here to learn together!
How can I customize my cookie designs?
Customization is where the magic happens! Use different cookie cutters for various shapes, and get creative with the colors of your icing. You could even use edible markers to draw designs on your cookies or mix in flavor extracts like almond or lemon for a twist! Layering your icing with different colors and textures can also create stunning effects. Just let your imagination run wild!
Can I make the dough ahead of time?
You bet! Making the dough ahead is a fantastic way to save time. You can refrigerate it for up to 3 days or freeze it for up to 3 months. Just make sure to wrap it tightly in plastic wrap. When you’re ready to bake, just let it thaw in the fridge overnight or at room temperature for a couple of hours, and you’re good to go!
How do I make the royal icing thick enough?
The key to perfect royal icing is to mix until it reaches the right consistency. Start with about 2 cups of powdered sugar and add a tiny bit of water at a time until you achieve a thick, pipeable texture—think toothpaste! If it’s too thin, just add more sugar. You can also test it by piping some onto parchment paper; it should hold its shape without running.
If you have more questions or need tips, feel free to reach out! I’m here to help you make the most out of your valentines cookie class experience. Happy baking!
Print
valentines cookie class: 5 Secrets to Sweet Success
A fun and interactive cookie decorating class for Valentine’s Day.
- Total Time: 42 minutes
- Yield: 24 cookies 1x
Ingredients
- 2 cups all-purpose flour
- 1 cup unsalted butter, softened
- 1 cup granulated sugar
- 1 large egg
- 1 teaspoon vanilla extract
- 1/2 teaspoon baking powder
- 1/2 teaspoon salt
- Royal icing
- Food coloring
- Sprinkles
Instructions
- Preheat the oven to 350°F (175°C).
- Cream together the butter and sugar until light and fluffy.
- Beat in the egg and vanilla extract.
- In a separate bowl, mix flour, baking powder, and salt.
- Gradually add the dry ingredients to the wet ingredients.
- Roll out the dough and cut into desired shapes.
- Bake cookies for 10-12 minutes.
- Let cookies cool completely before decorating.
- Prepare royal icing and add food coloring as desired.
- Decorate cookies with icing and sprinkles.
Notes
- Use parchment paper for easy cleanup.
- Make sure cookies are completely cool before decorating.
- You can make the dough ahead and refrigerate it.
- Prep Time: 30 minutes
- Cook Time: 12 minutes
- Category: Dessert
- Method: Baking
- Cuisine: American
- Diet: Vegetarian
Nutrition
- Serving Size: 1 cookie
- Calories: 150
- Sugar: 10g
- Sodium: 50mg
- Fat: 7g
- Saturated Fat: 4g
- Unsaturated Fat: 2g
- Trans Fat: 0g
- Carbohydrates: 20g
- Fiber: 0g
- Protein: 2g
- Cholesterol: 20mg
Keywords: valentines cookie class, cookie decorating, baking class