
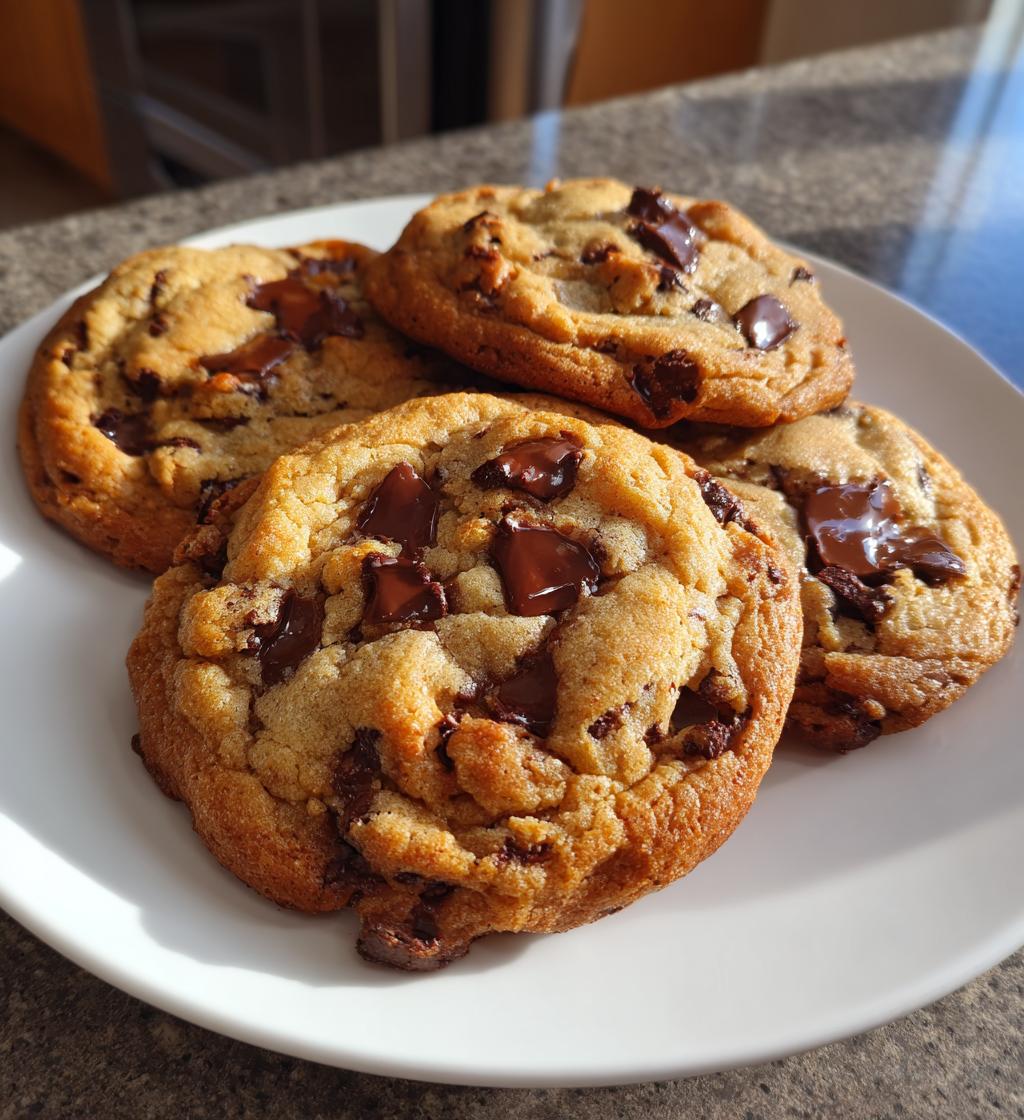
There’s something truly magical about baking for the holidays that warms my heart, and I can’t wait to share that joy with you! The aroma of freshly baked treats fills the air, creating an atmosphere of celebration and love. For me, it’s not just about the cookies; it’s about the laughter shared in the kitchen, the stories told over a mixing bowl, and the sticky fingers from sneaking a taste of the dough. Each recipe I bake carries with it a piece of my family’s history, a legacy of traditions passed down through generations.
As we gather around the table to enjoy these festive delights, I’m reminded of the importance of family and the way these sweet treats bring us all together. Whether it’s the familiar taste of chocolate chip cookies or a new recipe that sparks curiosity, there’s always excitement in the air. So grab your apron and let’s dive into this delightful holiday baking adventure together. Trust me, the memories we’ll create will be as sweet as the cookies themselves!
Ingredients List
Here’s what you’ll need to whip up a batch of these festive cookies. Each ingredient plays a crucial role in creating that perfect holiday treat, so let’s make sure we get them just right!
- 2 cups all-purpose flour
- 1 cup sugar
- 1/2 cup unsalted butter, softened to room temperature
- 2 large eggs
- 1 teaspoon vanilla extract
- 1 teaspoon baking powder
- 1/2 teaspoon salt
- 1 cup chocolate chips
Make sure your butter is softened; that means it should feel like a firm pillow when you press it, not melting or too hard. And those large eggs? They’re essential for adding richness and moisture to our cookies. Remember, each ingredient contributes to the warm, cozy flavors we all adore during the holidays!
How to Prepare Instructions
Now that we’ve gathered our ingredients, let’s dive into the fun part: baking these scrumptious cookies! Follow along with these easy steps, and I promise you’ll have a batch of delightful treats in no time.
Preheat the Oven
First things first, you’ll want to preheat your oven to 350°F (175°C). Preheating is crucial because it ensures that your cookies bake evenly and rise beautifully. Trust me, there’s nothing worse than putting your dough in a cold oven and ending up with flat cookies that resemble pancakes!
Cream Butter and Sugar
In a large mixing bowl, cream together the softened butter and sugar until light and fluffy. I like to use a hand mixer for this, but a sturdy wooden spoon works just fine too! You’re aiming for a pale, airy mixture that almost looks like whipped cream. This step is so important because it creates the airiness that makes our cookies soft and tender. So don’t rush it; take a couple of minutes to get that texture just right!
Incorporate Eggs and Vanilla
Next up, beat in the eggs one at a time, mixing well after each addition. This gives your dough that nice richness and moisture we want. Then, add in the vanilla extract and mix until everything is combined. The smell of vanilla wafting through your kitchen is just heavenly, isn’t it?
Combine Dry Ingredients
In another bowl, combine the flour, baking powder, and salt. Give it a little whisk to mix everything together evenly. This helps distribute the baking powder and salt throughout the flour, ensuring each cookie rises perfectly. Just remember, don’t skip this step – it’s all about balance!
Mix Wet and Dry Ingredients
Now, gradually add the dry mixture to the wet ingredients. I like to do this in three parts, mixing gently until just combined. Be careful not to overmix! You want to see a few flour streaks in the batter before moving on. Once that’s done, it’s time to fold in those delicious chocolate chips. I usually use a spatula for this part; it’s gentle and helps keep the dough light!
Prepare for Baking
Using a spoon or cookie scoop, drop spoonfuls of dough onto a baking sheet lined with parchment paper. Make sure to leave some space between each scoop – about 2 inches – because these cookies will spread a little while baking. You want them to have room to breathe and become those beautiful, cookie-shaped delights!
Baking Time
Pop your baking sheet into the preheated oven and bake for 10-12 minutes. You’ll know they’re done when the edges are golden brown but the center still looks slightly soft. They will continue to firm up as they cool, so don’t worry if they seem a little underbaked; that’s part of the magic!
Cooling Cookies
Once out of the oven, let your cookies cool on the baking sheet for about 5 minutes before transferring them to a wire rack to cool completely. This cooling step is essential because it helps them set and allows those flavors to develop even more. Plus, who can resist the warm, gooey goodness of freshly baked cookies? Just make sure to resist the urge to dive in too soon; your patience will pay off!
Why You’ll Love This Recipe
- Quick Preparation: With only 15 minutes of prep time, you can whip up these delightful cookies in no time, leaving you plenty of moments to enjoy the festivities!
- Festive Flavor: The combination of rich chocolate chips and buttery goodness creates a flavor that’s perfect for the holidays, making every bite feel like a celebration.
- Perfect for Sharing: These cookies are ideal for holiday gatherings, cookie swaps, or simply to brighten someone’s day. Trust me, they’ll bring smiles all around!
- Customizable: Feel free to mix it up! Add nuts, dried fruits, or even a sprinkle of sea salt on top to create your own unique twist.
- Family Tradition: Baking these cookies can become a cherished holiday tradition, bringing everyone together to create sweet memories that last a lifetime.
Tips for Success
Now that you’re all set to bake, here are some handy tips to ensure your cookies turn out absolutely perfect every time! Trust me, a little attention to detail goes a long way in the world of holiday baking.
- Use Room Temperature Ingredients: Make sure your butter and eggs are at room temperature before you start. This helps them mix together more easily, creating that lovely, fluffy texture we’re after. Just take them out of the fridge about 30 minutes before you begin – it makes a big difference!
- Don’t Overmix: When you’re combining your wet and dry ingredients, be gentle! Overmixing can lead to tough cookies. Just mix until everything is combined and you see a few flour streaks – that’s when you know you’re in the sweet spot!
- Adjust Baking Times: If you’re making larger cookies, adjust your baking time accordingly. They’ll need a bit longer in the oven to cook through, so keep an eye on them. If you’re making mini cookies, they’ll bake faster – check them a couple of minutes early!
- Chill the Dough: If you have the time, chilling your dough for 30 minutes before baking can enhance the flavor and texture of your cookies. It helps them hold their shape better, too! Just wrap it in plastic wrap and pop it in the fridge.
- Experiment with Add-Ins: Feel free to get creative! Try mixing in different types of chocolate chips, nuts, or dried fruits for a fun twist. Each batch can be a little different, and you might just discover a new favorite flavor combination!
- Know Your Oven: Every oven is a bit different. If you notice your cookies browning too quickly or not cooking through, consider adjusting the temperature slightly. Having an oven thermometer can help ensure you’re baking at the right heat.
With these tips in your back pocket, you’re well on your way to baking cookies that will impress everyone during the holidays! Happy baking, and enjoy every moment of this delicious journey!
Nutritional Information
As we indulge in these delightful cookies, it’s always good to keep an eye on the nutritional side of things. Below, I’ve put together some estimated nutritional data for each cookie, so you can enjoy knowing what’s in your sweet treats! Remember, these numbers are just estimates, and actual values can vary depending on specific ingredients used and portion sizes.
- Calories: 150
- Fat: 7g
- Saturated Fat: 4g
- Unsaturated Fat: 2g
- Trans Fat: 0g
- Cholesterol: 20mg
- Sodium: 50mg
- Carbohydrates: 20g
- Fiber: 1g
- Sugar: 10g
- Protein: 2g
These cookies are not just a treat; they also pack a little bit of energy to keep you going during the busy holiday season! Enjoy every bite, and remember that balance is key when indulging in your favorite festive goodies.
FAQ Section
Got questions about baking for the holidays? Don’t worry, I’ve got you covered! Here are some common queries I hear along with my best answers to help you navigate your festive baking adventures.
How should I store leftover cookies?
To keep your cookies fresh, store them in an airtight container at room temperature. They’ll stay delicious for about a week. If you want to keep them longer, you can freeze them! Just place them in a freezer-safe bag or container, and they’ll be good for up to three months. When you’re ready to enjoy, simply let them thaw at room temperature for a few hours.
Can I substitute ingredients in this recipe?
Absolutely! If you’re out of an ingredient or looking for a healthier option, there are always substitutions. For example, you can replace the all-purpose flour with whole wheat flour for a nuttier flavor. If you don’t have unsalted butter, salted butter works just fine; just cut back a bit on the added salt. And if you’re not a fan of chocolate chips, feel free to swap them out for dried fruit, nuts, or even white chocolate chips!
Can I make these cookies gluten-free?
Yes! You can use a 1:1 gluten-free baking mix instead of regular flour. Just check that your other ingredients, like baking powder, are also gluten-free. The texture might vary slightly, but they’ll still be delicious and festive!
What if I want to make these cookies larger or smaller?
If you prefer larger cookies, simply use a bigger scoop to portion out the dough and adjust the baking time. Larger cookies will need an extra couple of minutes in the oven. For smaller cookies, use a teaspoon to scoop the dough and keep an eye on them while baking, as they may cook a little faster.
Can I use different types of chocolate chips?
Yes, definitely! You can mix and match any type of chocolate you fancy. Dark chocolate, milk chocolate, or even peanut butter chips work wonderfully in this recipe. You could even throw in some butterscotch chips for a fun twist! Just remember, the more variety, the more fun your cookies will be!
How can I enhance the flavor of these cookies?
If you want to elevate the flavors, consider adding a pinch of cinnamon or nutmeg to the dry ingredients for a warm, cozy vibe. Another great idea is to mix in some citrus zest, like orange or lemon, for a refreshing twist. These little touches can make a world of difference during the holiday season!
I hope these FAQs help you feel more prepared and excited about your holiday baking! Remember, the most important part is to have fun and enjoy the process of creating delicious treats to share with your loved ones. Happy baking!
Storage & Reheating Instructions
Now that you’ve baked a delicious batch of cookies, let’s talk about how to keep them fresh and tasty! Proper storage is key to enjoying those sweet treats for days to come.
To store your leftover cookies, simply place them in an airtight container at room temperature. This helps maintain their chewy texture and delicious flavor. You’ll want to make sure they’re completely cool before sealing them up, or else moisture will build up and make them soggy. Trust me, nobody wants a sad, soggy cookie!
If you find yourself with more cookies than you can eat in a week, don’t worry! You can freeze them for later enjoyment. Just layer your cookies in a freezer-safe bag or container, separating each layer with parchment paper to prevent sticking. They can last up to three months in the freezer! When you’re ready for a treat, simply take out the desired amount and let them thaw at room temperature for a couple of hours. You can also pop them in the microwave for about 10-15 seconds for a warm, gooey experience that feels just like they came straight from the oven!
For a little extra touch, if you want to revive that fresh-baked taste, consider reheating your cookies in the oven. Preheat your oven to 350°F (175°C) and place the cookies on a baking sheet for about 5 minutes. This method will help them regain their original softness and warmth. Just be careful not to overdo it; you want them warmed through, not hard!
With these storage and reheating tips, you’ll be able to savor every last cookie long after they’ve come out of the oven. Enjoy the sweet rewards of your baking efforts, and happy snacking!
Print
Baking for the Holidays: 5 Joyful Recipes to Cherish
A guide to baking festive treats for the holidays.
- Total Time: 27 minutes
- Yield: 24 cookies 1x
Ingredients
- 2 cups all-purpose flour
- 1 cup sugar
- 1/2 cup unsalted butter, softened
- 2 large eggs
- 1 teaspoon vanilla extract
- 1 teaspoon baking powder
- 1/2 teaspoon salt
- 1 cup chocolate chips
Instructions
- Preheat your oven to 350°F (175°C).
- In a bowl, cream together the butter and sugar.
- Beat in the eggs one at a time.
- Add the vanilla extract and mix well.
- In another bowl, combine the flour, baking powder, and salt.
- Gradually add the dry mixture to the wet mixture.
- Fold in the chocolate chips.
- Drop spoonfuls of dough onto a baking sheet.
- Bake for 10-12 minutes until golden brown.
- Let cool before serving.
Notes
- Store cookies in an airtight container.
- Use different types of chocolate chips for variety.
- Adjust baking time for larger cookies.
- Prep Time: 15 minutes
- Cook Time: 12 minutes
- Category: Dessert
- Method: Baking
- Cuisine: American
- Diet: Vegetarian
Nutrition
- Serving Size: 1 cookie
- Calories: 150
- Sugar: 10g
- Sodium: 50mg
- Fat: 7g
- Saturated Fat: 4g
- Unsaturated Fat: 2g
- Trans Fat: 0g
- Carbohydrates: 20g
- Fiber: 1g
- Protein: 2g
- Cholesterol: 20mg
Keywords: baking for the holidays