
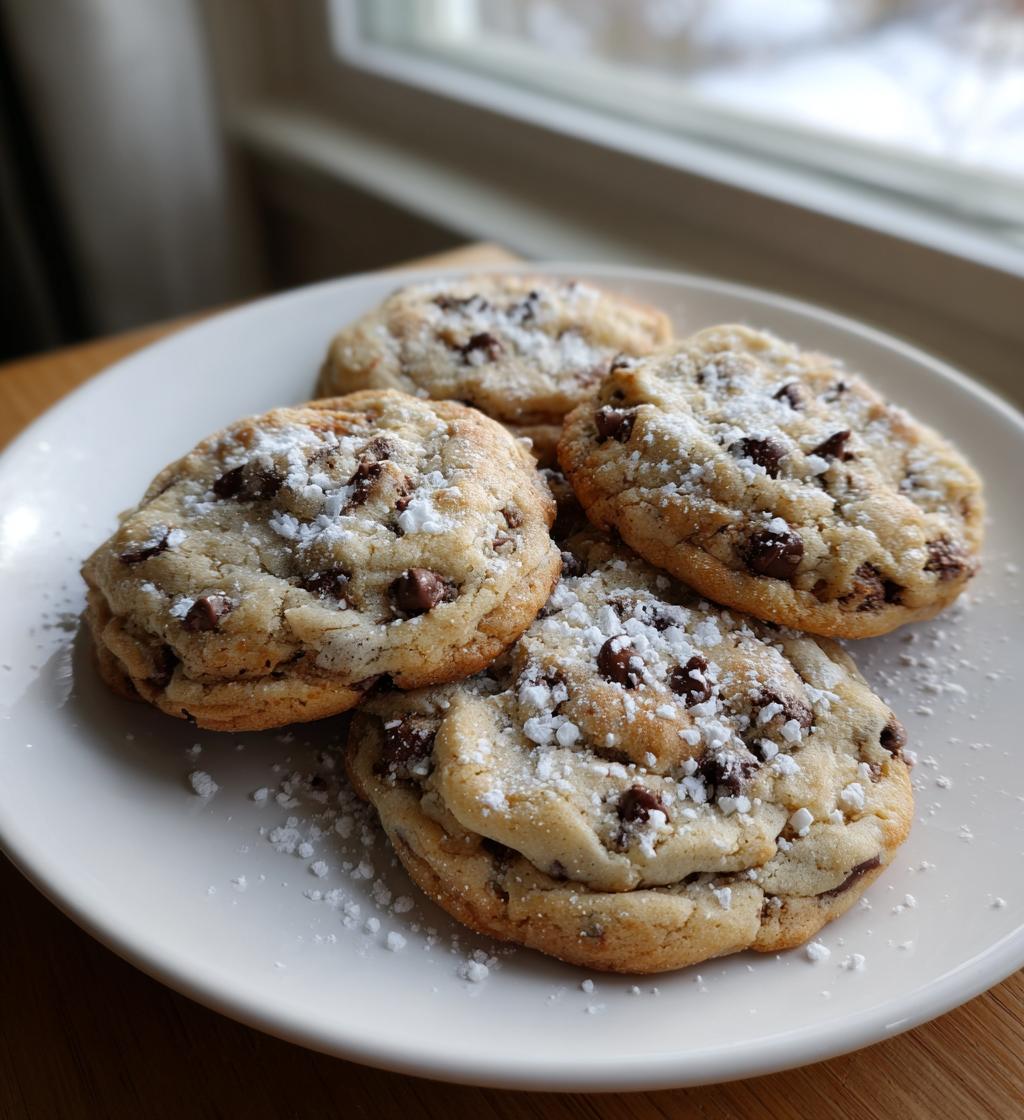
Ah, the joy of Christmas baking! There’s something truly magical about filling your home with the warm, sweet aroma of cookies during the holiday season. These delightful cookies are not just treats; they’re little bites of happiness that bring everyone together. Picture this: it’s a chilly December afternoon, and you’re surrounded by loved ones, laughter echoing while you bake together. The kids are rolling dough, and the adults are sneaking spoonfuls of chocolate chips when no one’s looking. This recipe is perfect for those cozy moments, yielding delicious cookies that are sure to become a cherished tradition in your home.
When I think back to my childhood, I can still hear my grandmother’s laughter as she guided me through her Christmas cookie-making rituals. We’d always make a big batch to share with family and friends, and I remember how we’d decorate them with sprinkles, making each cookie unique. These cookies are just like that – easy to whip up and perfect for sharing. Trust me, once you take that first bite, you’ll be transported back to those joyful holiday moments. So grab your apron, and let’s get baking!
Ingredients List
Gathering the right ingredients is key to making these scrumptious cookies! Here’s what you’ll need:
- 2 3/4 cups all-purpose flour
- 1 teaspoon baking soda
- 1/2 teaspoon salt
- 1 cup unsalted butter, softened to room temperature
- 1 1/2 cups white sugar
- 1 cup packed brown sugar
- 2 eggs
- 2 teaspoons vanilla extract
- 2 cups chocolate chips
- 1 cup chopped nuts (optional, but I love adding walnuts or pecans for extra crunch!)
Make sure your butter is softened; this step is crucial for achieving that perfect creamy texture when you’re creaming it with the sugars. And don’t skimp on the chocolate chips—double chocolate dreams await! If you’re feeling adventurous, you can swap in some different nuts or even throw in some dried cranberries for a festive twist. Happy baking!
How to Prepare Christmas Baking Cookies for the Holidays
Getting ready to bake these delicious Christmas cookies is half the fun! Follow these steps, and you’ll be on your way to creating the ultimate holiday treat that everyone will love!
Preheat the Oven
First things first, you need to preheat your oven to 375°F (190°C). This step is super important because it ensures your cookies bake evenly. If you pop them in before the oven is hot enough, you might end up with flat, sad cookies. So, set that temperature and let your oven work its magic while you prepare the dough!
Mix Dry Ingredients
In a medium bowl, grab your flour, baking soda, and salt. Whisk them together until they’re well combined. This step is crucial because it helps distribute the baking soda evenly throughout the flour, ensuring that your cookies rise perfectly. Don’t skip this – a well-mixed dry blend sets the foundation for cookie greatness!
Cream the Butter and Sugars
Now, onto the fun part! In a large mixing bowl, cream together the softened butter, white sugar, and brown sugar. You can use a hand mixer or a stand mixer for this, but if you’re feeling nostalgic, go for the good old wooden spoon! Beat the mixture until it’s light and fluffy, about 2-3 minutes. This is when the magic happens – the air gets incorporated into the mixture, creating a lovely texture that will make your cookies tender and delightful!
Incorporate Eggs and Vanilla
Next, add in the eggs, one at a time, and the vanilla extract. Make sure to mix well after each addition. This helps the eggs incorporate smoothly into the batter. Just be careful not to overbeat at this stage; you want to combine everything without making the batter too dense. A good rule of thumb is to mix until you can’t see any egg streaks – that’s your cue!
Combine Dry and Wet Mixtures
Now it’s time to bring it all together! Gradually fold the dry mixture into the wet ingredients. I like to add it in three parts, mixing gently with a spatula or wooden spoon. This way, you avoid overmixing, which can lead to tough cookies. You want to see a few flour streaks remaining when you’re done; that means you’re right on track!
Add Chocolate Chips and Nuts
Once everything is combined, it’s time for the pièce de résistance: the chocolate chips and nuts! Gently fold them into the batter until they’re evenly distributed. I love the balance of rich chocolate and crunchy nuts, but if you’re going nut-free, that’s totally fine too. Just make sure every bite has a bit of that gooey chocolate goodness!
Shape and Bake
Using a spoon or cookie scoop, drop rounded spoonfuls of dough onto ungreased cookie sheets, leaving a little space between each one for spreading. Bake them in your preheated oven for 9 to 11 minutes or until they’re golden around the edges. Keep an eye on them toward the end, as oven temperatures can vary. You want them to look just set and not too dark – they’ll continue to firm up as they cool!
Cooling Instructions
After baking, let the cookies cool on the sheets for a few minutes before transferring them to wire racks. This step is crucial because it allows them to firm up just enough so they don’t crumble apart. Once they’re on the racks, try to resist the urge to munch on them right away – let them cool completely for the best texture and flavor!
Why You’ll Love This Recipe
This Christmas cookie recipe is a true gem, and here’s why I know you’ll adore it just as much as I do:
- Easy Preparation: With simple ingredients and straightforward steps, you can whip up a batch in no time. Perfect for those busy holiday schedules!
- Delicious Flavor: The combination of buttery goodness, rich chocolate chips, and a hint of vanilla creates a flavor explosion that’s simply irresistible.
- Festive Spirit: These cookies capture the essence of the holidays. They’re perfect for sharing with family and friends or leaving out for Santa!
- Customizable: Feel free to make them your own! Add in your favorite nuts or swap chocolate chips for dried fruits – the options are endless.
- Memorable Moments: Baking these cookies is more than just a recipe; it’s about creating joyful memories with loved ones during the holiday season.
Trust me, once you bake these cookies, they’ll become a holiday tradition you look forward to year after year!
Tips for Success
Baking cookies might seem straightforward, but there are a few key tips that can make all the difference between a good cookie and a great one! Here are my tried-and-true tips to ensure your Christmas baking cookies turn out perfectly every time:
- Measure Your Ingredients Accurately: Baking is a science, so precise measurements are crucial. Use a kitchen scale if you have one, or make sure to spoon flour into your measuring cup and level it off with a knife. Packing flour can lead to dense cookies that miss the mark!
- Don’t Overmix: Once you combine the wet and dry ingredients, be gentle. Overmixing can develop gluten, resulting in tough cookies. Mix until just combined and a few flour streaks remain – trust me, they’ll turn out tender!
- Chill the Dough: If you want thicker cookies, chilling the dough for at least 30 minutes is a game changer. It helps the butter firm up, which leads to less spreading during baking. Plus, the flavors have a chance to meld together, making them even tastier!
- Watch the Baking Time: Every oven is different, so start checking your cookies a minute or two before the suggested time. You want them to be golden around the edges but still soft in the center. They’ll continue to cook on the sheet after you take them out!
- Use Quality Chocolate: Since chocolate chips are a star ingredient, use high-quality chocolate! It really makes a difference in flavor. Try semi-sweet or dark chocolate for a rich, decadent touch.
- Don’t Skip the Cooling Time: I know it’s tempting to dig in right away, but letting your cookies cool for a few minutes on the sheet before transferring them to a wire rack allows them to set properly. This way, they won’t fall apart when you try to move them!
These little tips might seem small, but they can elevate your cookie game and help you bake up a batch of delicious holiday cheer. Happy baking!
Nutritional Information
Now, I know many of us love to indulge during the holidays, but it’s good to have a little insight into what we’re enjoying! Here’s an estimated breakdown of the nutrition for each cookie, so you can savor every bite with a bit of knowledge:
- Calories: 150
- Fat: 7g
- Saturated Fat: 4g
- Unsaturated Fat: 2g
- Trans Fat: 0g
- Cholesterol: 15mg
- Sodium: 50mg
- Carbohydrates: 20g
- Fiber: 1g
- Sugar: 10g
- Protein: 2g
Keep in mind, these values can vary based on your specific ingredients and any tweaks you make to the recipe. But regardless of the numbers, the joy and warmth of baking these cookies far outweigh a little sugar, right? Enjoy every delicious moment this holiday season!
FAQ Section
Can I use different types of chocolate chips?
Absolutely! One of the best parts about baking these Christmas cookies is how customizable they are. You can swap semi-sweet chocolate chips for dark chocolate for a richer taste or even use milk chocolate if you prefer something sweeter. Feeling adventurous? Try adding white chocolate chips or even peanut butter chips for a fun twist! You could also mix and match – a combination of chocolate chips can create a delightful variety in every bite. The possibilities are endless, so go ahead and experiment!
How do I store the cookies?
To keep your cookies fresh and delicious, store them in an airtight container at room temperature. This will help maintain their chewy texture for several days. If you notice they start to dry out, you can add a slice of bread to the container – it helps keep the cookies moist! For longer storage, you can refrigerate them, but I recommend letting them come back to room temperature before enjoying them again. Trust me, they’ll taste just as good as the day you baked them!
Can I freeze the cookie dough?
Yes, you can definitely freeze the cookie dough! This is a lifesaver during the busy holiday season. Just scoop the dough into balls and place them on a baking sheet lined with parchment paper. Freeze them for about an hour until they’re solid, then transfer the dough balls to a zip-top freezer bag. When you’re ready to bake, you can pop them straight from the freezer onto your baking sheet. Just add a couple of extra minutes to the baking time. It’s a quick and easy way to enjoy fresh cookies whenever the craving hits!
What can I substitute for eggs?
If you’re looking for egg-free options, you’ve got a few great substitutes! One of my favorites is unsweetened applesauce – about 1/4 cup per egg works wonderfully and adds a bit of moisture. You can also use mashed bananas, which will give a slight banana flavor, or a flaxseed meal mixture (1 tablespoon of flaxseed meal mixed with 2.5 tablespoons of water, let it sit for a few minutes). These alternatives will keep your cookies moist and delicious without compromising on taste!
How can I make the cookies healthier?
There are several ways to lighten up your cookie recipe while still keeping them delicious! You can try using whole wheat flour instead of all-purpose flour for added fiber. Reducing the sugar by about a third won’t affect the texture too much, especially since these cookies are already sweetened with chocolate chips. If you want to go a step further, consider using coconut sugar or a sugar substitute like stevia. You can also add in some oats or seeds for extra nutrition. Just remember, a little bit of indulgence is part of the holiday spirit, but these tweaks can make your cookies a bit more wholesome!
Serving Suggestions
Now that you’ve baked up a batch of these delightful Christmas cookies, it’s time to think about how to elevate your holiday experience even further! Here are some fun serving suggestions that will make your cookies even more special:
- With a Glass of Milk: You can’t go wrong with the classic pairing of cookies and cold milk! Whether it’s regular, almond, or oat milk, it enhances the flavor and brings out the sweetness of the cookies.
- With Hot Cocoa: Imagine cozying up with a warm mug of hot chocolate topped with whipped cream or marshmallows, paired with these cookies. It’s the ultimate winter treat that will make you feel all the holiday vibes!
- As a Gift: Package a few cookies in a festive tin or box to share with friends and family. A little note or card can add a personal touch, making your gift extra special.
- With Ice Cream: For an indulgent dessert, serve these cookies warm with a scoop of vanilla ice cream on top. The melty ice cream combined with the warm cookie is pure bliss!
- On a Cookie Platter: Create a beautiful cookie platter with a variety of cookies, including your Christmas cookies, gingerbread men, and sugar cookies. Add some festive decorations like sprigs of holly or candy canes to make it visually appealing.
- At a Holiday Party: Don’t forget to bring a batch to your holiday gatherings! They’ll be a hit among guests, sparking joy and nostalgic memories with every bite.
These serving suggestions will surely enhance your cookie experience and bring even more warmth and joy to your holiday celebrations. Enjoy every delicious moment!
Storage & Reheating Instructions
Once you’ve baked a batch of these scrumptious Christmas cookies, you might find yourself with some delicious leftovers, and that’s a good thing! Here’s how to store them properly so they stay fresh and tasty:
To store your cookies, let them cool completely on a wire rack first. Once they’re cool, place them in an airtight container at room temperature. I like to layer parchment paper between the cookies to keep them from sticking together, especially if you’ve made a big batch. They should stay nice and soft for about a week, but trust me, they’ll probably be gone long before that!
If you want to keep your cookies for an extended period, you can freeze them. Just wrap each cookie individually in plastic wrap, then place them in a freezer-safe bag or container. They can last up to three months in the freezer. When you’re ready to enjoy them, just take out the desired number of cookies and let them thaw at room temperature for about 30 minutes. You can also pop them in the microwave for 10-15 seconds for a warm treat that tastes freshly baked!
If you want to reheat your cookies, the best method is to use the oven. Preheat your oven to 350°F (175°C) and place the cookies on a baking sheet. Heat them for about 5-7 minutes, or until they’re warm throughout. This will help soften them up again, bringing back that delightful, fresh-from-the-oven texture!
With these storage and reheating tips, you can enjoy your Christmas cookies long after the baking is done. Happy snacking!
Print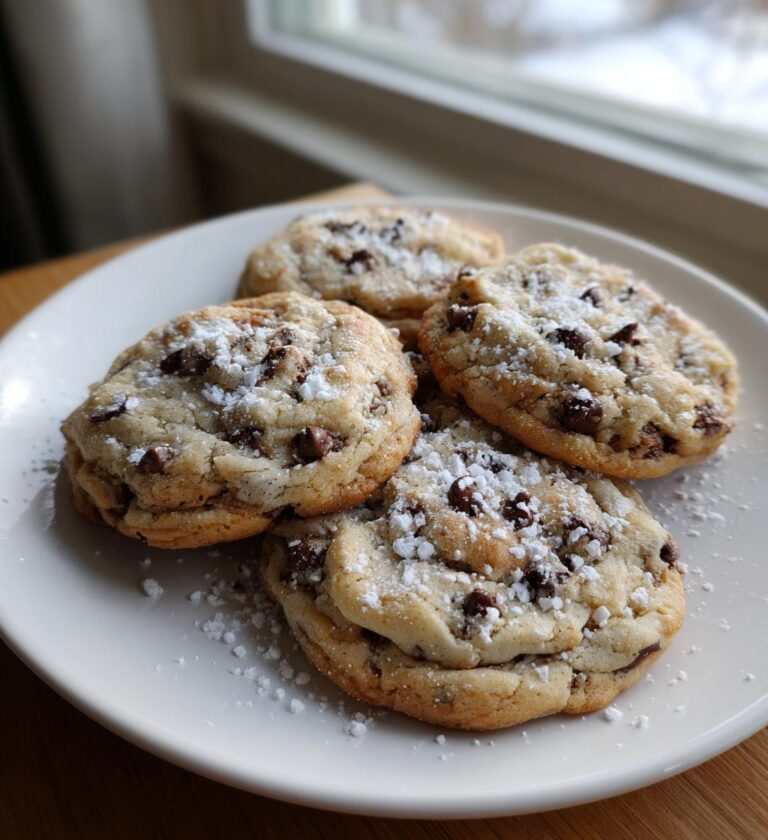
Christmas Baking Cookies: 7 Sweet Traditions for the Holidays
Delicious cookies perfect for Christmas baking during the holidays.
- Total Time: 30 minutes
- Yield: 24 cookies 1x
Ingredients
- 2 3/4 cups all-purpose flour
- 1 teaspoon baking soda
- 1/2 teaspoon salt
- 1 cup unsalted butter, softened
- 1 1/2 cups white sugar
- 1 cup packed brown sugar
- 2 eggs
- 2 teaspoons vanilla extract
- 2 cups chocolate chips
- 1 cup chopped nuts (optional)
Instructions
- Preheat your oven to 375°F (190°C).
- In a bowl, mix flour, baking soda, and salt.
- In another bowl, cream butter, white sugar, and brown sugar until smooth.
- Beat in eggs and vanilla.
- Gradually add the flour mixture to the butter mixture.
- Stir in chocolate chips and nuts.
- Drop by rounded spoonfuls onto ungreased cookie sheets.
- Bake for 9 to 11 minutes or until golden.
- Cool on cookie sheets for a few minutes before transferring to wire racks.
Notes
- For softer cookies, do not overbake.
- Chill dough for 30 minutes for a thicker cookie.
- Store cookies in an airtight container.
- Prep Time: 20 minutes
- Cook Time: 10 minutes
- Category: Dessert
- Method: Baking
- Cuisine: American
- Diet: Vegetarian
Nutrition
- Serving Size: 1 cookie
- Calories: 150
- Sugar: 10g
- Sodium: 50mg
- Fat: 7g
- Saturated Fat: 4g
- Unsaturated Fat: 2g
- Trans Fat: 0g
- Carbohydrates: 20g
- Fiber: 1g
- Protein: 2g
- Cholesterol: 15mg
Keywords: christmas baking, cookies, holidays