
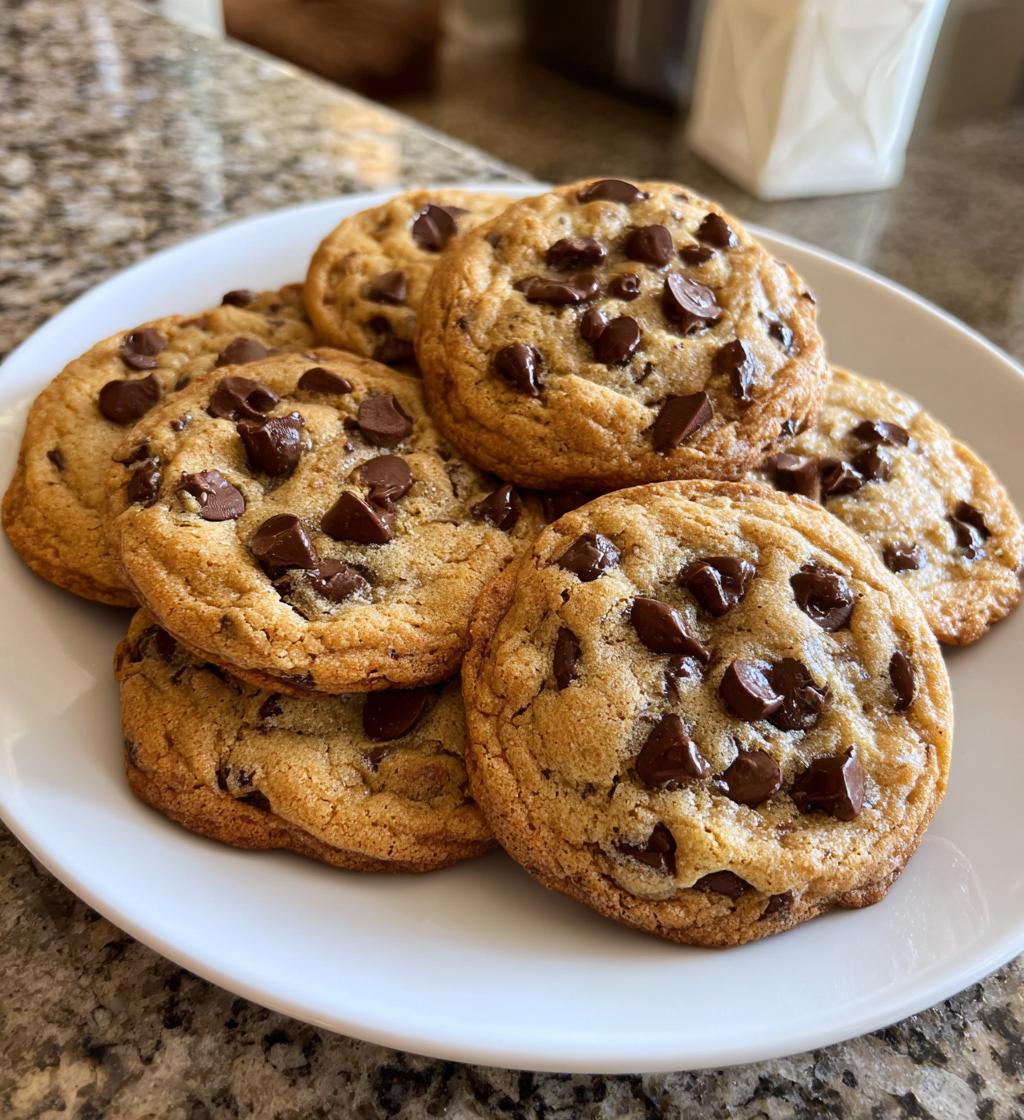
Ah, the holidays! There’s something incredibly magical about sharing delicious food with family and friends during this special time of year. It’s more than just nourishment; it’s about creating memories around the table. I remember my childhood holidays vividly, bustling in the kitchen with my family, laughter echoing as we whipped up festive treats together. The smell of freshly baked goodies wafting through the house was like an invitation to gather and celebrate.
That’s why I absolutely love diving into *holidays food ideas*! They have this unique appeal that makes gatherings feel extra special. Whether it’s a chocolatey dessert or a savory dish, each recipe we share helps to create a warm, inviting atmosphere where stories are told and laughter is shared. Trust me, having a few standout recipes in your holiday arsenal can make all the difference. They’re not just meals; they’re the heart of our celebrations!
Ingredients List
Let’s gather our ingredients for this delightful holiday treat! You’ll want to have everything ready to go for a smooth baking experience. Here’s what you’ll need:
- 2 cups all-purpose flour
- 1 cup sugar
- 1 cup butter, softened
- 3 large eggs
- 1 teaspoon pure vanilla extract
- 1/2 teaspoon baking powder
- 1/4 teaspoon salt
- 1 cup chocolate chips
Make sure to use high-quality chocolate chips for the best flavor! Trust me, it really makes a difference in the final product. Gather these ingredients, and let’s get ready to create some holiday magic!
How to Prepare Instructions
Now that we have our ingredients lined up, it’s time to dive into the preparation! Follow these easy steps to whip up a delicious treat that’ll impress everyone at your holiday gathering.
Step-by-Step Preparation
- Preheat your oven: Start by preheating your oven to 350°F (175°C). This is super important for even baking, so don’t skip this step!
- Cream the butter and sugar: In a large mixing bowl, cream together the softened butter and sugar until the mixture becomes light and fluffy. It usually takes about 2-3 minutes of mixing. Trust me, this step is crucial for that perfect texture!
- Add the eggs: One at a time, add the eggs to the mixture, mixing well after each addition. This helps incorporate them evenly. Don’t rush this part; take your time!
- Stir in vanilla: Once the eggs are well mixed in, stir in the pure vanilla extract. The aroma is heavenly!
- Mix the dry ingredients: In a separate bowl, combine the all-purpose flour, baking powder, and salt. This ensures even distribution of the leavening agents.
- Combine wet and dry: Gradually add the dry mixture to the wet ingredients, stirring gently until just combined. Be careful not to overmix; a few flour streaks are perfectly fine!
- Fold in chocolate chips: Gently fold in the chocolate chips with a spatula. This is where the fun happens—who wouldn’t want to get a bite of that melty chocolate goodness?
- Pour into the pan: Pour the batter into a greased baking pan, smoothing the top with a spatula.
- Bake: Place the pan in the preheated oven and bake for 25-30 minutes or until a toothpick inserted into the center comes out clean.
- Cool: After baking, let it cool in the pan for about 10 minutes, then transfer it to a wire rack to cool completely before serving. This step is essential to prevent sogginess!
And there you have it! Follow these steps, and you’ll end up with a scrumptious dessert that’s sure to bring smiles around the holiday table. Happy baking!
How to Prepare Instructions
Now that we have our ingredients lined up, it’s time to dive into the preparation! Follow these easy steps to whip up a delicious treat that’ll impress everyone at your holiday gathering.
Step-by-Step Preparation
- Preheat your oven: Start by preheating your oven to 350°F (175°C). This is super important for even baking, so don’t skip this step!
- Cream the butter and sugar: In a large mixing bowl, cream together the softened butter and sugar until the mixture becomes light and fluffy. It usually takes about 2-3 minutes of mixing. Trust me, this step is crucial for that perfect texture!
- Add the eggs: One at a time, add the eggs to the mixture, mixing well after each addition. This helps incorporate them evenly. Don’t rush this part; take your time!
- Stir in vanilla: Once the eggs are well mixed in, stir in the pure vanilla extract. The aroma is heavenly!
- Mix the dry ingredients: In a separate bowl, combine the all-purpose flour, baking powder, and salt. This ensures even distribution of the leavening agents.
- Combine wet and dry: Gradually add the dry mixture to the wet ingredients, stirring gently until just combined. Be careful not to overmix; a few flour streaks are perfectly fine!
- Fold in chocolate chips: Gently fold in the chocolate chips with a spatula. This is where the fun happens—who wouldn’t want to get a bite of that melty chocolate goodness?
- Pour into the pan: Pour the batter into a greased baking pan, smoothing the top with a spatula.
- Bake: Place the pan in the preheated oven and bake for 25-30 minutes or until a toothpick inserted into the center comes out clean.
- Cool: After baking, let it cool in the pan for about 10 minutes, then transfer it to a wire rack to cool completely before serving. This step is essential to prevent sogginess!
And there you have it! Follow these steps, and you’ll end up with a scrumptious dessert that’s sure to bring smiles around the holiday table. Happy baking!
Why You’ll Love This Recipe
- Festive: This dessert brings a touch of holiday cheer to any gathering, making it the perfect sweet treat to share with loved ones.
- Easy to Prepare: With simple ingredients and straightforward steps, you won’t feel overwhelmed in the kitchen. It’s designed for bakers of all skill levels!
- Delicious Flavor: The rich combination of chocolate and buttery goodness is guaranteed to satisfy your sweet tooth and leave everyone wanting more.
- Perfect for Gatherings: Whether it’s a family dinner or a holiday party, this dessert is always a hit. It’s sure to bring smiles and compliments from your guests!
- Vegetarian-Friendly: This recipe is suitable for vegetarians, making it a great addition to any holiday spread, ensuring everyone can enjoy a slice.
Tips for Success
To ensure your holiday treat turns out absolutely perfect, here are some practical tips that I swear by:
- Use room temperature ingredients: Make sure your butter and eggs are at room temperature before you start mixing. This helps create a smooth batter and contributes to a lighter texture.
- Check your oven temperature: Ovens can be tricky! Use an oven thermometer if you have one to ensure it’s accurate. Trust me, you don’t want to bake at the wrong temperature and end up with a dense dessert.
- Avoid overmixing the batter: When combining your wet and dry ingredients, mix until just combined. Overmixing can lead to a tough texture, and nobody wants that! A few flour streaks are totally fine.
- Keep an eye on baking time: Every oven is different, so start checking the cake a few minutes before the recommended baking time. You want it perfectly baked, not overdone!
- Let it cool properly: After baking, be sure to let your dessert cool in the pan for about 10 minutes before transferring it to a wire rack. This helps maintain moisture and prevents it from becoming soggy.
Follow these tips, and you’ll be well on your way to impressing everyone with your baking skills this holiday season!
Variations
If you’re feeling adventurous or want to mix things up a bit, there are plenty of delicious variations to this holiday treat! Here are some fun ideas to customize the recipe to your taste:
- Add nuts: Chopped walnuts or pecans can add a delightful crunch and extra flavor. Just fold in about a cup of your favorite nuts along with the chocolate chips for a tasty twist!
- Experiment with chocolate: Feel free to swap out the standard chocolate chips for white chocolate, dark chocolate, or even peanut butter chips. Each type brings its own unique flavor to the dessert!
- Incorporate dried fruits: Dried cranberries, cherries, or apricots can add a nice tartness that balances the sweetness. Just chop them up and mix them in with the chocolate chips—so good!
- Spice it up: Want to give it a cozy, warm flavor? Add a teaspoon of cinnamon or nutmeg to the dry ingredients. It’ll make your kitchen smell heavenly while baking!
- Make it festive: For a holiday-themed touch, consider adding a splash of peppermint extract or some crushed candy canes to the batter. It’s a fun way to make this treat even more festive!
These variations can take your holiday dessert to the next level, ensuring there’s something for everyone to enjoy. So go ahead and get creative—your taste buds will thank you!
Serving Suggestions
Now that you’ve got this scrumptious holiday dessert ready to go, let’s talk about how to serve it up for maximum enjoyment! Presentation can elevate your treat from tasty to truly memorable.
One of my favorite ways to enjoy this dessert is to serve it warm, topped with a generous dollop of whipped cream. The lightness of the cream complements the rich, buttery flavor perfectly. If you’re feeling a bit indulgent, a scoop of vanilla ice cream takes it to the next level. Just imagine that melty goodness mixing with the warm cake—heavenly!
If you want to keep it simple, a light dusting of powdered sugar adds a touch of elegance and sweetness that’s hard to resist. It looks pretty and makes the dessert feel extra festive!
And let’s not forget about drinks! A steaming cup of hot cocoa or a spiced chai latte pairs beautifully with the chocolatey flavor of your cake. If you prefer something a bit more bubbly, a sparkling cider or festive punch can add a fun twist to your holiday spread. These pairings not only enhance the flavors but also create a cozy atmosphere that everyone will love.
So, gather your loved ones, set the table, and don’t be shy about showcasing your delightful dessert in all its glory. Enjoy every bite and the joyful moments that come with it!
Storage & Reheating Instructions
Once you’ve baked this delightful holiday treat and shared it with friends and family, you might find some leftovers (if you’re lucky!). Here’s how to store and reheat your delicious creation to keep it tasting fresh!
First off, let your dessert cool completely at room temperature before you store it. This step is crucial to prevent condensation from forming and making your cake soggy. Once it’s cooled, transfer any leftovers to an airtight container. You can keep it at room temperature for up to three days, but if you won’t be eating it that quickly, pop it in the fridge to extend its freshness.
When you’re ready to enjoy your treat again, reheating is super easy! If you prefer a warm slice, you can microwave it for about 10-15 seconds. Just keep an eye on it to avoid overheating – nobody wants a dry piece! Alternatively, you can reheat it in the oven at 350°F (175°C) for about 5-10 minutes. This method brings back that lovely fresh-baked aroma and warmth, making it feel just like it came out of the oven again!
With these storage and reheating tips, you can savor the flavors of your holiday baking for days to come. Enjoy every last bite!
Nutritional Information
When it comes to enjoying this delicious holiday treat, it’s always good to know what you’re indulging in! Here’s a quick breakdown of the estimated nutritional values per serving, which is about one piece of the cake:
- Calories: 200
- Fat: 10g
- Saturated Fat: 6g
- Unsaturated Fat: 3g
- Trans Fat: 0g
- Cholesterol: 50mg
- Sodium: 150mg
- Carbohydrates: 25g
- Fiber: 1g
- Sugar: 15g
- Protein: 2g
Keep in mind that these values are estimates and can vary based on the specific ingredients you use. Enjoying this treat in moderation is key, especially during the festive season! Happy baking and indulging!
FAQ Section
Got some questions about this delicious holiday treat? No worries! Here are some common inquiries and their answers to help you out:
How can I adjust this recipe for dietary needs?
If you have specific dietary requirements, there are some easy adjustments you can make! For a dairy-free version, you can substitute the butter with a plant-based margarine or coconut oil. Also, use dairy-free chocolate chips to keep it entirely dairy-free. For those watching their sugar intake, consider using a sugar substitute that measures like sugar, just be sure to check the conversion ratios.
Can I make this recipe gluten-free?
Absolutely! You can easily make this dessert gluten-free by swapping out the all-purpose flour for a gluten-free all-purpose blend. Just ensure that your blend contains xanthan gum, which helps mimic the texture of traditional flour. It’s always a good idea to check the labels on your chocolate chips, too, to make sure they’re gluten-free!
What’s the best way to store leftovers?
Storing your leftovers properly is key to keeping them fresh! Once your dessert has cooled completely, place it in an airtight container. You can store it at room temperature for up to three days. If you want to keep it longer, pop it in the fridge, where it’ll stay fresh for about a week. Just remember to let it come to room temperature or gently reheat before serving for the best flavor!
If you have any more questions or need further assistance, feel free to reach out! Happy baking!
Print
holidays food ideas: 7 Delightful Recipes to Celebrate
Delicious and festive food ideas for holidays.
- Total Time: 45 minutes
- Yield: 12 servings 1x
Ingredients
- 2 cups of all-purpose flour
- 1 cup of sugar
- 1 cup of butter
- 3 eggs
- 1 teaspoon of vanilla extract
- 1/2 teaspoon of baking powder
- 1/4 teaspoon of salt
- 1 cup of chocolate chips
Instructions
- Preheat your oven to 350°F (175°C).
- Cream together the butter and sugar in a bowl.
- Add eggs one at a time, mixing well after each addition.
- Stir in vanilla extract.
- In another bowl, combine flour, baking powder, and salt.
- Gradually add the dry ingredients to the wet mixture.
- Fold in the chocolate chips.
- Pour the batter into a greased baking pan.
- Bake for 25-30 minutes or until a toothpick comes out clean.
- Let cool before serving.
Notes
- Use high-quality chocolate chips for better flavor.
- Store leftovers in an airtight container.
- Can substitute butter with margarine if needed.
- Prep Time: 15 minutes
- Cook Time: 30 minutes
- Category: Dessert
- Method: Baking
- Cuisine: American
- Diet: Vegetarian
Nutrition
- Serving Size: 1 piece
- Calories: 200
- Sugar: 15g
- Sodium: 150mg
- Fat: 10g
- Saturated Fat: 6g
- Unsaturated Fat: 3g
- Trans Fat: 0g
- Carbohydrates: 25g
- Fiber: 1g
- Protein: 2g
- Cholesterol: 50mg
Keywords: holidays food ideas