
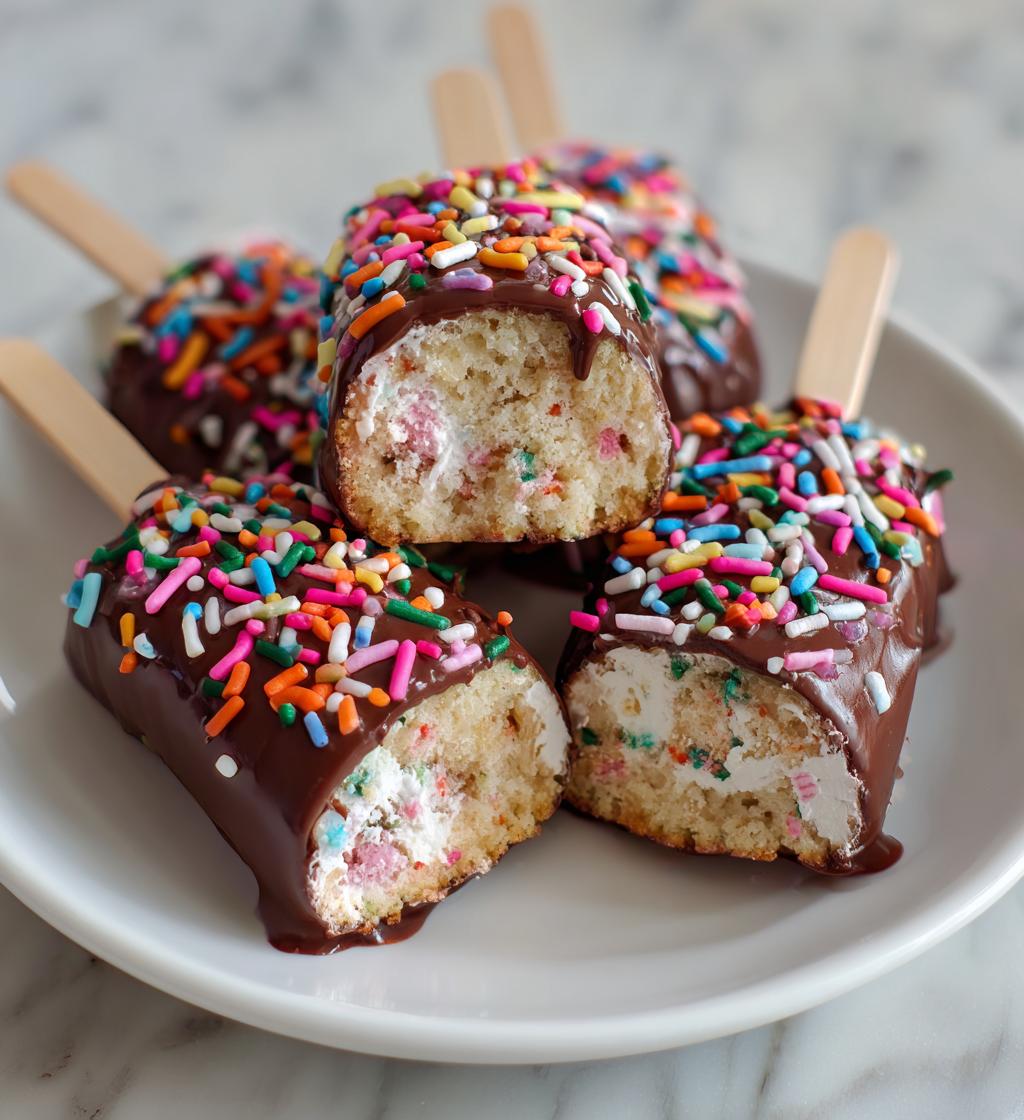
Valentine’s Day is all about love, and there’s no better way to show someone you care than with sweet, homemade treats! That’s where *valentines day cakesicles* come in. These delightful little desserts combine the fun of cake pops with a unique twist, making them the perfect gift for your loved ones. Trust me, there’s something magical about handing over a beautifully decorated cakesicle, especially when you see the smiles on their faces as they take a bite.
I remember the first time I made these for my partner. I had a blast mixing the cake, rolling it into shapes, and dipping them in chocolate. The kitchen was a colorful mess, but the end result was totally worth it! Plus, this recipe is incredibly easy to follow—perfect for even the busiest of bakers. You can whip these up in no time, and they’re so much fun to decorate! With just a few simple ingredients and some sprinkles, you’ll have a crowd-pleaser that makes any Valentine’s celebration extra special.
Ingredients List
Gathering the right ingredients for your *valentines day cakesicles* is super important! Here’s what you’ll need:
- 1 box cake mix: Choose your favorite flavor—chocolate, vanilla, or red velvet work wonderfully!
- 3 eggs: These help bind the cake together and add moisture.
- 1 cup water: This is essential for mixing with the cake mix.
- 1/2 cup vegetable oil: This adds richness and ensures your cakesicles are moist.
- 1 cup frosting: Use store-bought or homemade; it’s the secret to making the cake mixture stick together.
- 12 oz chocolate coating: You can opt for milk, dark, or white chocolate—whatever your heart desires!
- Sprinkles for decoration: Get creative! Brightly colored sprinkles add a festive touch.
These ingredients come together to create a delicious treat that’s just waiting to be decorated and shared!
How to Prepare *Valentines Day Cakesicles*
Making *valentines day cakesicles* is not only fun but also a great way to express your creativity! Let’s dive into the step-by-step process that’ll have you whipping up these sweet treats in no time. Here’s how to do it:
- Preheat your oven: Start by preheating your oven to 350°F (175°C). This is crucial for getting that perfect bake!
- Mix the cake batter: In a large mixing bowl, prepare the cake mix according to the package instructions. This usually involves adding the 3 eggs, 1 cup of water, and 1/2 cup of vegetable oil to the cake mix. Give it a good stir until it’s nice and smooth.
- Pour and bake: Pour the cake batter into a greased baking pan. Bake for about 30 minutes or until a toothpick inserted in the center comes out clean. While it bakes, you can enjoy the heavenly aroma filling your kitchen!
- Cool the cake: Once baked, remove the cake from the oven and let it cool completely in the pan. This step is so important! If you skip it, your cakesicles might crumble.
- Crumble the cake: After cooling, take the cake out of the pan and crumble it into a large bowl. You want it to be fine, almost like sand, so it sticks together well.
- Add frosting: Mix in 1 cup of frosting to the crumbled cake. Get your hands in there and mix it up until it’s well combined. You want a moldable consistency that holds together when you shape it.
- Shape the cakesicles: Take small amounts of the mixture and shape them into popsicle shapes. Don’t worry about being perfect; each one will have its own charm!
- Freeze: Place the shaped cakesicles on a baking sheet lined with parchment paper and freeze for at least 1 hour. This helps them firm up, making them easier to dip in chocolate.
- Melt the chocolate: While waiting, melt your chocolate coating in the microwave. Heat it in 30-second intervals until it’s smooth and fully melted. Stir it well to avoid any lumps.
- Dip and decorate: Remove the cakesicles from the freezer. Dip each one into the melted chocolate, covering it completely. Let the excess chocolate drip off before placing it back on the parchment paper. Immediately sprinkle with decorations—this is where you can get extra creative!
- Set and serve: Allow the chocolate to set at room temperature. Once firm, your delicious cakesicles are ready to be enjoyed. Share them with your loved ones and watch their faces light up!
And there you have it! With these simple steps, you can create beautiful and tasty *valentines day cakesicles* that are sure to impress.
Why You’ll Love This Recipe
- Easy to make: With just a few simple steps, you’ll have a batch of adorable cakesicles ready to go. Perfect for even the most novice bakers!
- Customizable flavors: Mix and match your favorite cake flavors and frosting to create unique combinations that suit everyone’s taste.
- Great for parties: These cakesicles are a hit at any gathering! They’re easy to serve and make for a fun dessert table centerpiece.
- Perfect for gifting: Wrap them up beautifully, and you’ve got a thoughtful, homemade gift that shows you care. Who wouldn’t love a sweet treat made just for them?
Trust me, once you make these *valentines day cakesicles*, you’ll find every reason to whip up another batch!
Tips for Success
To ensure your *valentines day cakesicles* turn out perfectly, here are some handy tips that I always keep in mind:
- Achieving the right texture: Make sure to crumble the cake finely before mixing it with frosting. This ensures everything binds together nicely, giving you that perfect moldable consistency.
- Melting chocolate: When melting your chocolate coating, do it in 30-second intervals in the microwave, stirring in between. This prevents it from burning and helps achieve that smooth, glossy finish.
- Decoration ideas: Get creative with your toppings! Try using edible glitter, themed sprinkles, or even drizzles of contrasting chocolate for a fancy touch. You can also use colored candy melts for a pop of color!
With these tips, you’ll be on your way to making cakesicles that not only taste amazing but look fabulous too!
Variations
One of the best parts about making *valentines day cakesicles* is how versatile they can be! Feel free to get creative and switch things up to match your taste or the occasion. Here are a few fun variations to try:
- Different cake flavors: Why not mix things up and use fun flavors like lemon, funfetti, or red velvet? Each will give your cakesicles a unique twist that’ll surprise your loved ones!
- Chocolate coatings: Instead of just regular chocolate, experiment with white chocolate, dark chocolate, or even colored candy melts. You can create a stunning visual display by using a combination of different coatings!
- Alternative decorations: Think beyond sprinkles! You can use crushed nuts, coconut flakes, or even a drizzle of caramel or peanut butter for an extra special touch. Edible glitter can add that wow factor, too!
With these variations, you can make each batch of *valentines day cakesicles* truly your own, ensuring everyone gets a delightful surprise with every bite!
Storage & Reheating Instructions
Storing your *valentines day cakesicles* properly is key to keeping them fresh and delightful! Once they’re set and decorated, you can place them in an airtight container. Just make sure to separate layers with parchment paper to prevent any sticking. They’ll stay fresh in the refrigerator for up to a week—if they last that long!
If you want to make them ahead of time, you can freeze the uncoated cakesicles. Just wrap them tightly in plastic wrap and then place them in a freezer-safe bag. They can be stored this way for up to a month! When you’re ready to enjoy them, simply thaw them in the fridge for a few hours before dipping in chocolate.
Reheating isn’t really necessary, but if you find them a bit too firm after freezing, let them sit at room temperature for about 15-20 minutes to soften up a bit before indulging. This will help maintain that delightful texture you love!
Nutritional Information
When it comes to sweet treats like *valentines day cakesicles*, it’s always good to have a little insight into what you’re enjoying. Here’s an estimated breakdown of the nutritional values per cakesicle:
- Calories: 250
- Fat: 12g
- Saturated Fat: 5g
- Trans Fat: 0g
- Cholesterol: 40mg
- Sodium: 150mg
- Carbohydrates: 34g
- Fiber: 1g
- Sugar: 18g
- Protein: 3g
These values can vary based on the ingredients and flavors you choose, but this gives you a general idea of what to expect. Enjoy your delicious cakesicles in moderation as part of a balanced diet!
FAQ Section
Got questions about making your *valentines day cakesicles*? No worries, I’ve got you covered! Here are some of the most common queries I hear:
- How do I customize flavors? Customizing your cakesicles is super easy! Just switch out the cake mix for your favorite flavor—think lemon, red velvet, or even a funfetti mix. You can also choose different frostings to complement your cake flavor, like cream cheese frosting for a rich touch!
- Can I make them ahead of time? Absolutely! You can prepare the cakesicles and freeze them uncoated for up to a month. Just remember to wrap them tightly in plastic wrap and store them in a freezer-safe bag. When you’re ready to enjoy them, thaw in the fridge and dip them in chocolate.
- How do I store leftovers? If you have any leftover cakesicles (which is a rare occurrence!), store them in an airtight container in the refrigerator for up to a week. Just be sure to separate layers with parchment paper to prevent sticking!
- Can I use a different type of chocolate coating? Yes, feel free to get creative! You can use white chocolate, dark chocolate, or even colored candy melts for a fun twist. Each type will give your cakesicles a unique flavor and look!
Hopefully, these answers help you on your way to making the best *valentines day cakesicles*! If you have more questions, don’t hesitate to ask!
Call to Action
Now that you’ve got the scoop on making these delightful *valentines day cakesicles*, I can’t wait to hear how yours turn out! If you give this recipe a try, please drop a comment below and let me know your thoughts. Did you add your own twist? I’d love to see your creations, so feel free to share photos on social media and tag me! And if you enjoyed this recipe, don’t forget to rate it—your feedback means the world to me. Happy baking and spreading the love this Valentine’s Day!
Print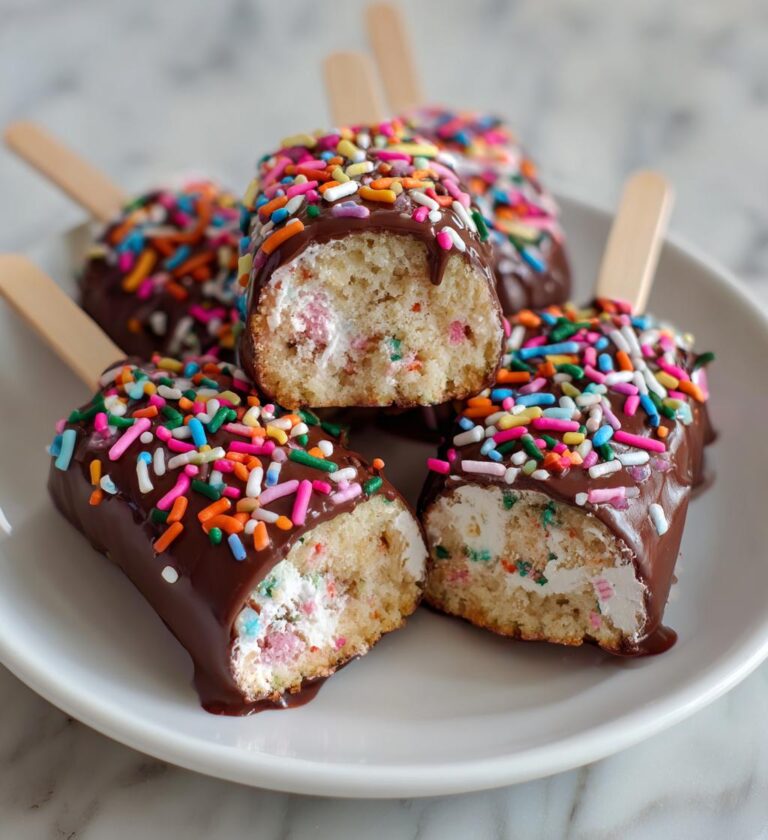
Valentines Day Cakesicles: 7 Ways to Delight Your Love
Delicious cakesicles for Valentine’s Day.
- Total Time: 1 hour 50 minutes
- Yield: 12 cakesicles 1x
Ingredients
- 1 box cake mix
- 3 eggs
- 1 cup water
- 1/2 cup vegetable oil
- 1 cup frosting
- 12 oz chocolate coating
- Sprinkles for decoration
Instructions
- Preheat the oven to 350°F (175°C).
- Prepare the cake mix according to package instructions.
- Pour the batter into a baking pan and bake for 30 minutes.
- Let the cake cool completely.
- Crumble the cooled cake into a bowl.
- Add frosting and mix until combined.
- Shape the mixture into popsicle shapes.
- Freeze for 1 hour.
- Melt the chocolate coating in a microwave.
- Dip each cakesicle in the chocolate.
- Sprinkle with decorations.
- Let set before serving.
Notes
- Use any cake flavor you prefer.
- Store in the refrigerator.
- Make ahead and freeze for later use.
- Prep Time: 20 minutes
- Cook Time: 30 minutes
- Category: Dessert
- Method: Baking and Freezing
- Cuisine: American
- Diet: Vegetarian
Nutrition
- Serving Size: 1 cakesicle
- Calories: 250
- Sugar: 18g
- Sodium: 150mg
- Fat: 12g
- Saturated Fat: 5g
- Unsaturated Fat: 7g
- Trans Fat: 0g
- Carbohydrates: 34g
- Fiber: 1g
- Protein: 3g
- Cholesterol: 40mg
Keywords: valentines day cakesicles, cakesicles, cake pops, Valentine's dessert