
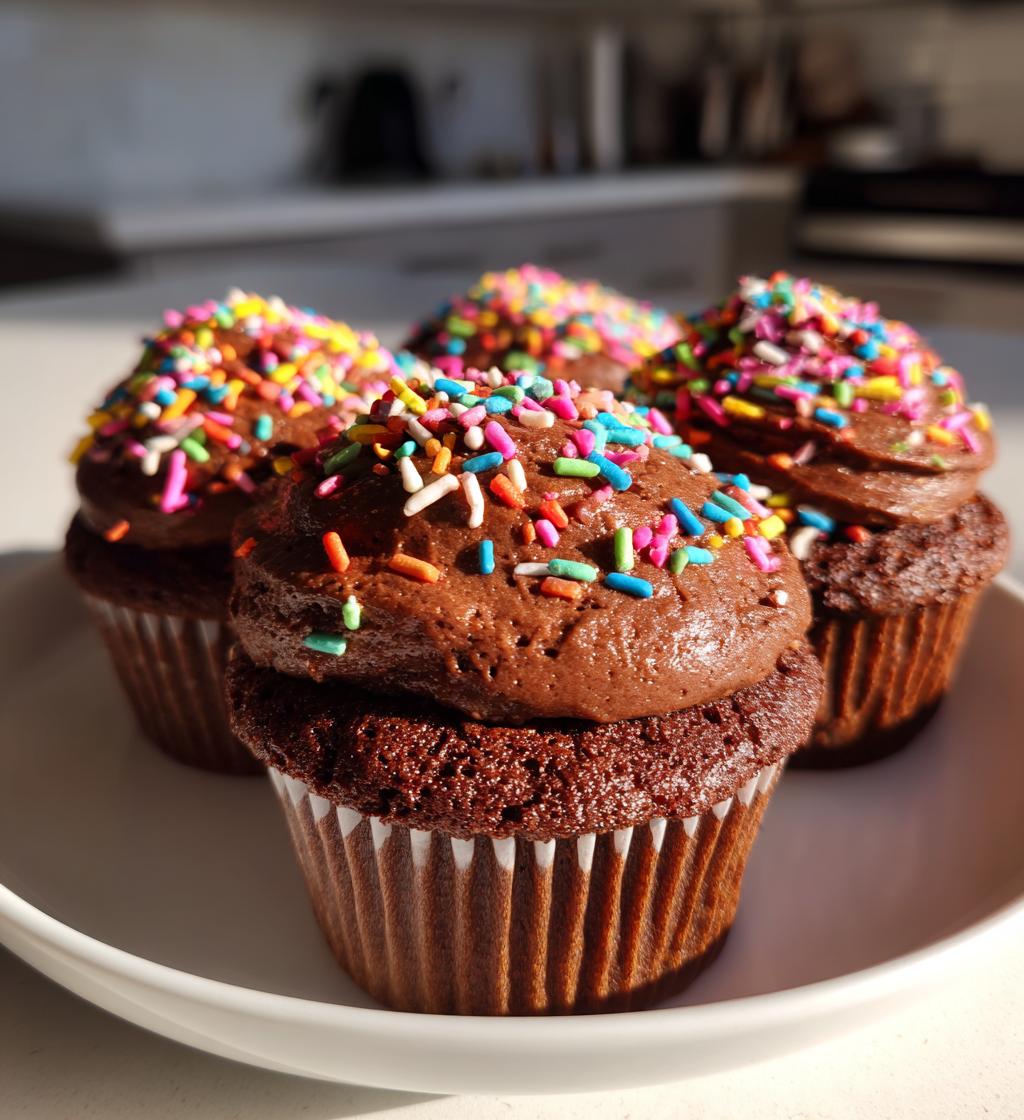
Valentine’s Day is all about love, and what better way to express that than with a batch of delightful valentines cupcakes? I can’t tell you how much joy fills my kitchen when I whip up these little treats! The rich, chocolaty aroma wafting through the air is simply irresistible, and as they bake, anticipation builds for that first bite. These cupcakes are not just desserts; they’re sweet tokens of affection perfect for sharing with friends, family, or that special someone.
Imagine a cozy afternoon spent baking together, laughter filling the room as you decorate each cupcake with colorful frosting and sprinkles. Trust me, the smiles you’ll get from handing these out will warm your heart. Whether you’re hosting a Valentine’s gathering or just treating yourself, these valentines cupcakes are sure to impress. They’re simple to make, and the results are nothing short of spectacular. So, let’s dive in and get ready to create some mouthwatering memories this Valentine’s Day!
Ingredients for Valentines Cupcakes
These valentines cupcakes are not only delicious but also require just a few simple ingredients to whip up magic in your kitchen. Here’s what you’ll need:
- 1 1/2 cups all-purpose flour
- 1 cup sugar
- 1/2 cup unsweetened cocoa powder
- 1 tsp baking powder
- 1/2 tsp baking soda
- 1/4 tsp salt
- 1/2 cup unsalted butter, softened
- 2 large eggs
- 1 tsp vanilla extract
- 1 cup milk
- 1 cup frosting of choice, for topping
- Sprinkles for decoration
These ingredients come together to create the softest, most decadent cupcakes that will surely delight anyone lucky enough to taste them. Don’t skip on the sprinkles; they add that extra festive touch that makes these cupcakes all the more special!
How to Prepare Valentines Cupcakes
Now that we have our ingredients ready, let’s jump into the fun part—making these delicious valentines cupcakes! I promise it’s easier than it sounds, and the end result will have you grinning from ear to ear. Follow along with these simple steps, and you’ll be a cupcake pro in no time!
Preheating the Oven
First things first, you’ll want to preheat your oven to 350°F (175°C). This step is super important! Preheating ensures that the cupcakes bake evenly and rise beautifully. If you skip this, you might end up with dense or unevenly cooked cupcakes, and we definitely don’t want that! So, go ahead and set that oven timer while you gather your ingredients.
Mixing the Dry Ingredients
In a large mixing bowl, combine the all-purpose flour, sugar, cocoa powder, baking powder, baking soda, and salt. I love using a whisk for this part—it really helps to aerate the dry ingredients and ensures everything is evenly mixed. Just give it a good stir until you see no lumps. Trust me, this is a crucial step to achieving that light and fluffy cupcake texture we’re aiming for!
Adding the Wet Ingredients
Next up, it’s time to add the wet ingredients! Toss in the softened unsalted butter, eggs, vanilla extract, and milk into the bowl with your dry ingredients. Now, here’s where the magic happens! Mix everything together until you have a smooth batter. You can use an electric mixer or a sturdy whisk—just be careful not to overmix. You want everything to blend nicely without creating too much gluten. A few small lumps are perfectly fine!
Filling the Cupcake Liners
Now that you have your batter ready, grab your cupcake liners and place them in a muffin tin. Here’s a little tip: fill each liner about 2/3 full with the batter. This is super important because if you overfill them, you’ll end up with cupcakes that overflow and become a hot mess in the oven. You want them to rise just right, so take a moment to do this step carefully. I like to use an ice cream scoop for easy and even filling!
Baking the Cupcakes
Pop those filled cupcake liners into your preheated oven and bake for about 20-25 minutes. The smell that will fill your kitchen during this time is nothing short of heavenly! To check for doneness, stick a toothpick into the center of a cupcake—if it comes out clean or with just a few crumbs, they’re ready. Don’t be tempted to open the oven door too early; this can cause them to sink!
Cooling and Frosting
Once they’re baked to perfection, carefully remove the cupcakes from the oven and let them cool in the pan for about 5 minutes. After that, transfer them to a wire rack to cool completely. This step is crucial—if you frost them while they’re still warm, the frosting will melt and slide right off! Once cooled, go ahead and frost them with your favorite frosting and sprinkle with colorful decorations. You’re now ready to serve these adorable valentines cupcakes!
Why You’ll Love These Valentines Cupcakes
These valentines cupcakes are sure to steal your heart, and here’s why:
- Easy to Make: With straightforward steps and simple ingredients, anyone can whip up these delectable treats. You’ll feel like a baking pro in no time!
- Deliciously Rich Flavor: The combination of cocoa and sweetness creates a mouthwatering chocolate treat that will have everyone coming back for seconds.
- Perfect for Sharing: Whether you’re celebrating with family, friends, or a special someone, these cupcakes are a sweet way to spread love and joy.
- Customizable Frosting: Choose your favorite frosting flavors to match the occasion or your personal taste. The options are endless!
- Festive Presentation: With colorful sprinkles on top, these cupcakes not only taste great but look beautiful too—perfect for any Valentine’s celebration!
Trust me, once you try these cupcakes, they’ll become a staple in your baking repertoire, ready to impress for any occasion!
Tips for Success with Valentines Cupcakes
To ensure your valentines cupcakes turn out perfectly every time, I’ve gathered some tried-and-true tips that make all the difference. Trust me; these little nuggets of wisdom will elevate your baking game!
Use Room Temperature Ingredients
One of the best pieces of advice I can give you is to make sure your ingredients are at room temperature before you start mixing. This includes the butter, eggs, and milk. When everything is at the same temperature, it combines more easily, resulting in a smoother batter and a lighter cupcake. So, take your eggs and butter out of the fridge about 30 minutes before you bake. It’s worth the wait!
Avoid Overmixing
It’s super tempting to keep mixing once everything is in the bowl, but overmixing can lead to dense cupcakes. Mix just until the ingredients are combined—some small lumps are totally fine! Gently folding the batter with a spatula towards the end can help maintain that light, fluffy texture we’re after.
Measure Ingredients Accurately
Precision is key in baking, so make sure to measure your ingredients correctly. For flour, spoon it into your measuring cup and level it off with a knife instead of scooping directly from the bag. This prevents packing, which can lead to dry cupcakes. For sugar and cocoa, the same rule applies! Little details like this can affect the outcome of your cupcakes.
Check for Doneness Carefully
When it’s time to check if your cupcakes are done, be sure to use a toothpick inserted in the center. If it comes out clean or with just a few crumbs, they’re ready to come out of the oven. But be cautious—overbaking can lead to dry cupcakes, and we definitely don’t want that! Keep an eye on the timer and start checking a minute or two early if you’re unsure.
Let Them Cool Completely
After baking, let your cupcakes cool in the pan for about 5 minutes before transferring them to a wire rack. This helps them set properly. And remember, wait until they’re completely cool before frosting! Frosting on warm cupcakes can create a gooey mess, and we want them looking beautiful for your Valentine’s celebration.
By following these simple tips, you’ll be well on your way to creating perfect valentines cupcakes that will impress everyone and fill your heart with joy. Happy baking!
Variations on Valentines Cupcakes
Now that you’ve mastered the classic valentines cupcakes, let’s have some fun with variations! There are so many delicious ways to customize these treats, and I can’t wait to share my favorite ideas with you. These tweaks will keep your baking exciting and impress your loved ones even more!
Different Frosting Flavors
While the standard frosting is delightful, why not switch things up? Here are some frosting ideas that will take your cupcakes to the next level:
- Chocolate Ganache: Melt equal parts of heavy cream and chocolate for a rich, decadent topping. Drizzle it over the cooled cupcakes for a glossy finish.
- Vanilla Buttercream: A classic choice! Just whip up some unsalted butter with powdered sugar, a splash of vanilla extract, and a little milk for creaminess.
- Strawberry Frosting: Mix in some pureed fresh strawberries or strawberry jam into your buttercream for a fruity twist. It’s a perfect match for Valentine’s Day!
- Peanut Butter Frosting: Combine peanut butter with powdered sugar and a bit of milk for a nutty flavor that pairs beautifully with chocolate cupcakes.
Adding Fruit Fillings
Another fun idea is to add a surprise filling inside your cupcakes! Think about:
- Cherry in the Center: Before baking, place a maraschino cherry or a fresh cherry pit-free in the middle of the batter. It adds a delightful burst of flavor!
- Raspberry Jam: Spoon a dollop of raspberry jam into the center of each cupcake before baking. The tartness of the raspberries complements the chocolate perfectly.
- Lemon Curd: For a citrusy kick, add lemon curd in the center of your cupcakes. It’ll give a refreshing surprise that balances the sweetness.
Going for Different Textures
Want to add some crunch? Consider incorporating:
- Nuts: Chopped walnuts or pecans mixed into the batter can provide a lovely crunch and add a nutty flavor to your cupcakes.
- Chocolate Chips: Fold in semi-sweet or white chocolate chips into the batter for added richness and gooey pockets of chocolate in every bite.
With these variations, you can easily turn your valentines cupcakes into a whole new experience! Don’t hesitate to experiment and find your favorite combinations. Happy baking, and enjoy spreading the love with these delightful treats!
Storage & Reheating Instructions
Now that you’ve created these delightful valentines cupcakes, you’ll want to make sure they stay fresh and delicious for as long as possible! Storing them properly is key, and I’ve got a few simple tips to help you out.
Storing Your Cupcakes
To keep your cupcakes at their best, place them in an airtight container. This prevents them from drying out and keeps them moist. If you have frosting on top, be sure to let the cupcakes sit at room temperature for about 30 minutes before covering them. This way, the frosting won’t stick to the lid of the container. I recommend using a container that’s just a bit larger than the cupcakes themselves—this keeps them from getting squished.
If you plan to enjoy them within a few days, simply store them at room temperature. However, for longer storage, you can keep them in the fridge. Just remember, cupcakes stored in the fridge might dry out a bit faster, so try to consume them within a week.
Freezing Cupcakes
If you want to save some for later, freezing is a fantastic option! Here’s how I do it:
- Let the cupcakes cool completely after baking.
- Wrap each cupcake individually in plastic wrap. This helps to lock in moisture and prevent freezer burn.
- Place the wrapped cupcakes in a freezer-safe bag or container, labeling them with the date for reference.
These cupcakes can be frozen for up to three months. When you’re ready to enjoy them, simply take them out of the freezer and let them thaw at room temperature. You can also pop them in the microwave for a few seconds to warm them up, but be careful not to overdo it! A quick 10-15 seconds should do the trick.
Reheating Tips
If you’ve stored your cupcakes in the fridge or freezer and want to enjoy them warm, here’s a quick method:
- For refrigerated cupcakes, place one on a microwave-safe plate and heat for about 10 seconds. Check if it’s warmed through; if not, add another 5 seconds.
- If you’ve frozen them, let them thaw first, then microwave them for about 15 seconds. This helps to retain their moisture and flavor!
With these storage and reheating tips, your valentines cupcakes will be ready to delight your taste buds anytime you crave a sweet treat. Happy baking and storing!
Nutritional Information
Understanding the nutritional value of your valentines cupcakes can help you enjoy them guilt-free! Here’s an estimated breakdown of what you’ll find in each delightful cupcake:
- Calories: 250
- Fat: 12g
- Saturated Fat: 7g
- Unsaturated Fat: 3g
- Trans Fat: 0g
- Cholesterol: 40mg
- Sodium: 150mg
- Carbohydrates: 33g
- Fiber: 1g
- Sugar: 20g
- Protein: 3g
Keep in mind that these values are estimates and can vary based on the specific ingredients and portion sizes used. Enjoy these cupcakes as part of a balanced diet, and remember, it’s all about moderation and joy in your baking adventures!
Frequently Asked Questions
Got questions about making the perfect valentines cupcakes? Don’t worry, I’ve got you covered! Here are some common queries along with my tips to help you bake with confidence.
Can I use a different type of flour?
Absolutely! If you want to make these cupcakes gluten-free, you can substitute the all-purpose flour with a 1:1 gluten-free flour blend. Just make sure it includes xanthan gum, which helps give the cupcakes structure. If you’re trying a different flour like whole wheat, be aware that it might change the texture slightly, so you may need to adjust the liquid a bit.
What’s the best way to store leftover cupcakes?
The best way to store your cupcakes is to keep them in an airtight container at room temperature for up to three days. If you want to keep them longer, you can refrigerate them, but I recommend eating them within a week to enjoy their best flavor and texture. Just remember to let them sit out for a bit before serving to bring back that fresh taste!
Can I make these cupcakes ahead of time?
Yes, you can! These valentines cupcakes store well, so feel free to bake them a day or two in advance. Just make sure they’re completely cooled before frosting. For even longer storage, consider freezing them. Wrap them individually in plastic wrap and place them in a freezer-safe bag. They’ll stay fresh for up to three months!
What can I substitute for eggs in this recipe?
If you need an egg substitute, you can use unsweetened applesauce! For each egg, replace it with 1/4 cup of applesauce. This will keep your cupcakes moist and delicious. You can also use flaxseed meal or chia seeds mixed with water—1 tablespoon of flaxseed meal or chia seeds with 2.5 tablespoons of water equals one egg. Just let it sit for a few minutes until it thickens!
Are these cupcakes suitable for vegans?
To make these cupcakes vegan, you can substitute the eggs with applesauce or a flaxseed mix as mentioned above, and use a plant-based milk instead of regular milk. For the frosting, opt for a vegan butter alternative or make a simple glaze with powdered sugar and a splash of plant-based milk. They’ll still taste amazing and everyone can enjoy them!
I hope these answers help you on your baking journey! If you have any more questions or need further tips, feel free to reach out. Happy baking and enjoy those valentines cupcakes!
Print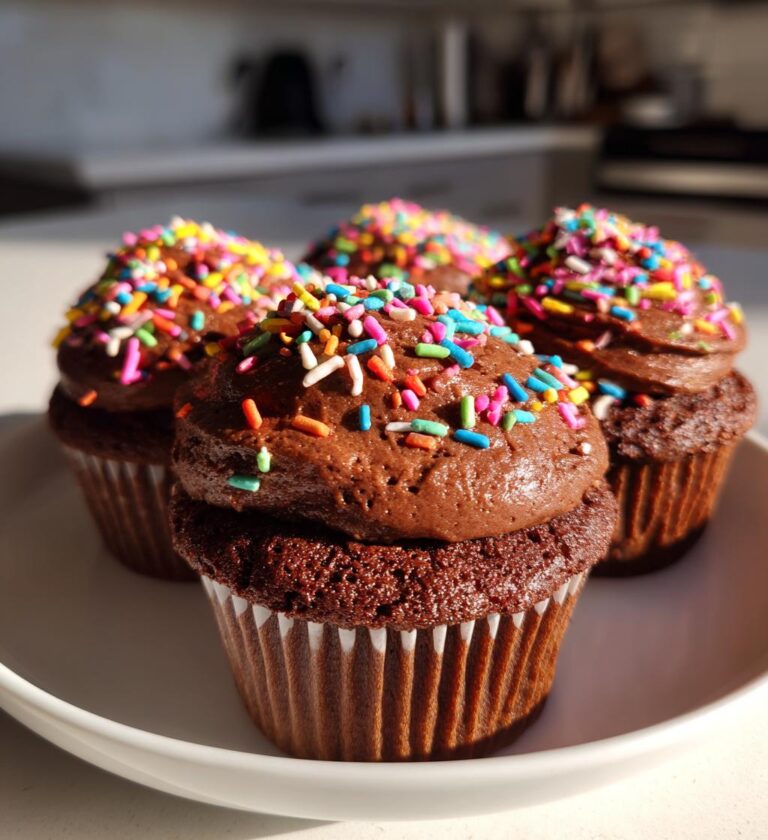
valentines cupcakes to Share Love and Joy This Season
Delicious cupcakes perfect for Valentine’s Day.
- Total Time: 45 minutes
- Yield: 12 cupcakes 1x
Ingredients
- 1 1/2 cups all-purpose flour
- 1 cup sugar
- 1/2 cup unsweetened cocoa powder
- 1 tsp baking powder
- 1/2 tsp baking soda
- 1/4 tsp salt
- 1/2 cup unsalted butter, softened
- 2 large eggs
- 1 tsp vanilla extract
- 1 cup milk
- 1 cup frosting of choice
- Sprinkles for decoration
Instructions
- Preheat the oven to 350°F (175°C).
- In a bowl, mix flour, sugar, cocoa powder, baking powder, baking soda, and salt.
- Add butter, eggs, vanilla, and milk. Mix until smooth.
- Fill cupcake liners 2/3 full with batter.
- Bake for 20-25 minutes or until a toothpick comes out clean.
- Let cupcakes cool completely.
- Frost with your favorite frosting.
- Decorate with sprinkles.
Notes
- Store cupcakes in an airtight container.
- For a fun twist, add a cherry in the center.
- Prep Time: 20 minutes
- Cook Time: 25 minutes
- Category: Dessert
- Method: Baking
- Cuisine: American
- Diet: Vegetarian
Nutrition
- Serving Size: 1 cupcake
- Calories: 250
- Sugar: 20g
- Sodium: 150mg
- Fat: 12g
- Saturated Fat: 7g
- Unsaturated Fat: 3g
- Trans Fat: 0g
- Carbohydrates: 33g
- Fiber: 1g
- Protein: 3g
- Cholesterol: 40mg
Keywords: valentines cupcakes, cupcake recipe, dessert recipe