
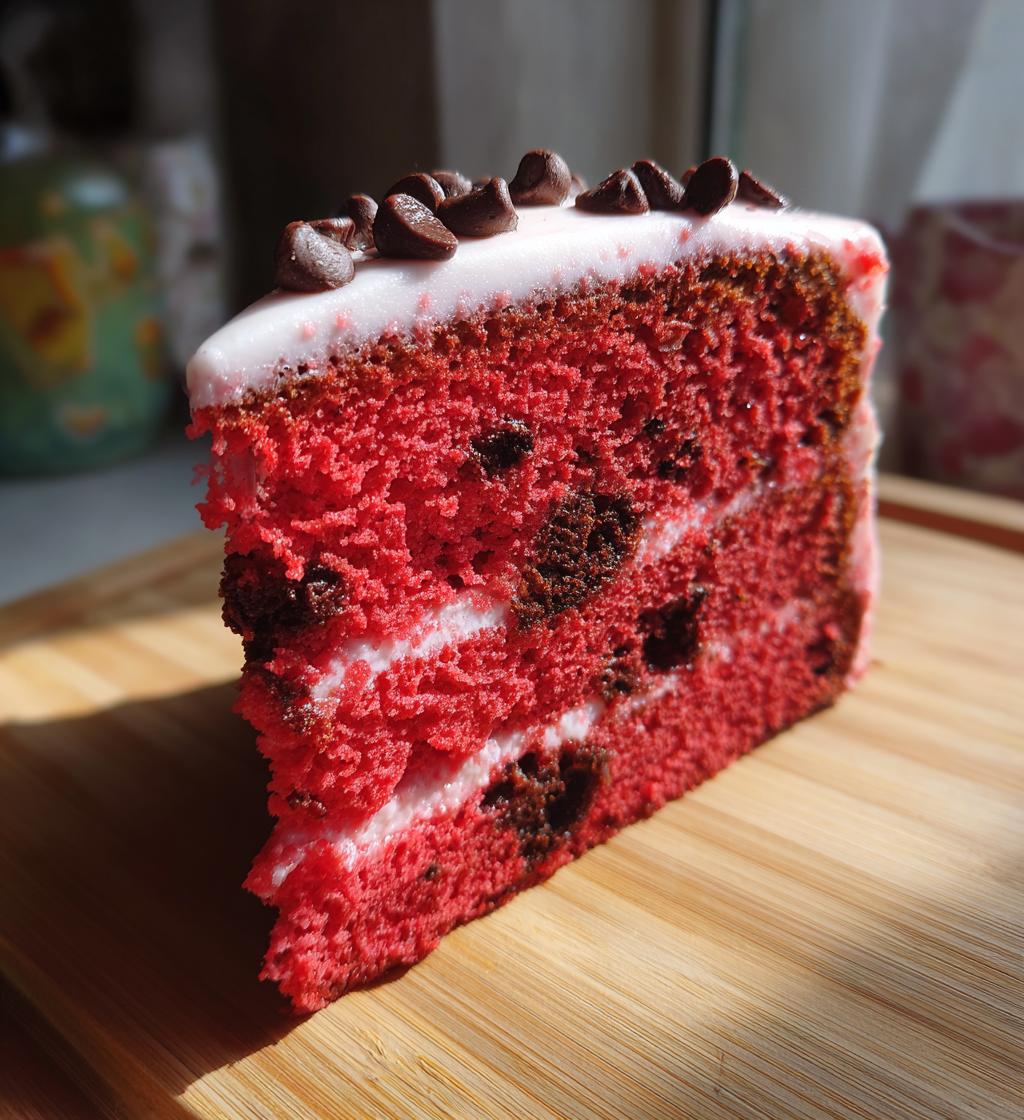
Ah, Valentine’s Day! It’s that magical time of year when love is in the air, and nothing says “I care” quite like a tray of homemade treats. Baking for my loved ones is my way of showing just how much they mean to me. There’s something incredibly special about creating a delightful assortment of goodies from scratch, especially when the aroma of chocolate and sweet vanilla fills the kitchen. It’s like a warm hug in the form of a baked good!
Imagine pulling out heart-shaped cakes, sprinkled with vibrant red and pink frosting, each bite a little piece of joy. My *valentines bakery* is all about sharing love through food, making it an experience that everyone can savor together. Whether you’re surprising your partner, delighting your kids, or even treating yourself (because you deserve it!), these baked delights will make the day memorable. Plus, there’s something so satisfying about seeing the smiles on their faces when they take that first bite. Trust me, baking for Valentine’s Day isn’t just about the treats; it’s about creating connections and sweet memories that linger long after the last crumb is gone!
Ingredients List
Let’s gather our ingredients for this Valentine’s Day treat! Each component plays a vital role in creating that rich, chocolaty goodness that everyone will adore. Here’s what you’ll need:
- 2 cups all-purpose flour: This is the base of our baked goods, providing the structure and texture. Make sure to spoon it into the measuring cup and level it off for accuracy!
- 1 cup sugar: Sweetness is key! This will add just the right amount of sugary goodness to balance out the cocoa.
- 1/2 cup unsweetened cocoa powder: This is where the magic happens! It gives our treats that deep chocolate flavor. Look for a good quality cocoa for the best taste.
- 1 teaspoon baking powder: A little leavening agent to help our goodies rise and become fluffy!
- 1/2 teaspoon baking soda: This works alongside the baking powder to create the perfect texture. Trust me, it’s essential!
- 1/4 teaspoon salt: Just a pinch! It enhances all the flavors and balances the sweetness.
- 1/2 cup unsalted butter, softened: Butter adds richness and flavor. Make sure it’s soft enough to mix easily but not melted.
- 2 large eggs: Eggs help bind everything together and give our baked goods that lovely moistness.
- 1 teaspoon vanilla extract: Pure vanilla is your best friend here! It adds a warm, aromatic flavor that complements the chocolate perfectly.
- 1 cup buttermilk: This ingredient adds moisture and a slight tang that makes everything taste divine. If you don’t have buttermilk, you can easily make a substitute by adding a tablespoon of vinegar to regular milk!
Once you gather all these ingredients, you’ll be set to create some sweet magic in your kitchen. Let’s get baking!
How to Prepare Instructions
Now that we’ve got our ingredients ready, let’s dive into the delightful process of making these sweet treats! Follow along, and I promise you’ll have a batch of baked goodness that’ll impress everyone on Valentine’s Day.
Step 1: Preheat the Oven
First things first, you’ll want to preheat your oven to 350°F (175°C). Preheating is super important because it ensures that your batter starts baking immediately when it hits the pan. This helps achieve that perfect rise and texture. Trust me, you don’t want to skip this step!
Step 2: Combine Dry Ingredients
In a large mixing bowl, grab your all-purpose flour, sugar, cocoa powder, baking powder, baking soda, and salt. Whisk them together until they’re well combined. I like to use a whisk for this—it helps break up any lumps in the cocoa powder and ensures an even distribution of all those dry ingredients. Take a moment to really mix it thoroughly, creating a light, airy blend that will help your goodies turn out fluffy and delicious!
Step 3: Incorporate Wet Ingredients
Now, let’s bring in the wet ingredients! Add the softened unsalted butter, large eggs, and vanilla extract to your dry mixture. Using a hand mixer or a sturdy wooden spoon, mix everything together until it’s just combined. Don’t worry if it looks a little chunky; we’ll smooth things out shortly! Gradually pour in the buttermilk, mixing until you achieve a smooth batter. The buttermilk will add moisture and richness, making your treats utterly irresistible!
Step 4: Bake the Batter
Once your batter is smooth and well-mixed, it’s time to pour it into your greased baking pans. If you’re feeling festive, heart-shaped pans are a perfect choice for Valentine’s Day! Fill each pan about halfway to allow room for the batter to rise. Bake them in the preheated oven for about 25-30 minutes. You’ll know they’re done when a toothpick inserted into the center comes out clean—no batter sticking to it!
Step 5: Cooling and Decorating
After the baking time is up, carefully remove the pans from the oven and let them cool in the pans for about 10 minutes. Then, gently transfer the cakes to a wire rack to cool completely. This step is crucial because decorating warm cakes can lead to a melty mess! Once they’re cool, feel free to get creative with your decorations. Think luscious red and pink frosting, or sprinkle some fun decorations on top to really make them pop! Your Valentine’s bakery will look as amazing as it tastes!
Why You’ll Love This Recipe
This Valentine’s Day treat is not just about delicious flavors; it’s also about the experience of baking and sharing with those you love. Here are some reasons why this recipe will become your go-to for the holiday:
- Quick and Easy: With a total time of just 50 minutes, you can whip up these delightful goodies without spending all day in the kitchen!
- Perfect for Sharing: Whether you’re surprising your partner or making treats for friends and family, this recipe yields 12 servings, making it easy to share the love.
- Customizable Decorations: Get creative with the frosting and toppings! You can easily personalize each treat with colorful sprinkles or themed decorations to make them extra special.
- Rich Chocolate Flavor: The combination of cocoa powder and vanilla creates a decadent flavor that’s sure to please any chocolate lover!
- Heart-Shaped Fun: Using heart-shaped pans adds a charming touch to your baked goods, making them perfect for Valentine’s celebrations.
Trust me, once you try this recipe, it’ll be a staple in your Valentine’s bakery year after year! You’ll love how it brings people together and creates sweet memories to cherish.
Tips for Success
To ensure your Valentine’s Day baked goods turn out perfectly, I’ve gathered some tried-and-true tips that will make your baking experience even better. These little nuggets of wisdom come from my own kitchen adventures, and I hope they help you along the way!
Use Room-Temperature Ingredients
Before you start mixing, make sure your butter and eggs are at room temperature. This step is crucial because it helps everything blend together smoothly, creating a nice, airy batter. If you forget to take them out ahead of time, no worries! You can warm eggs in a bowl of warm water for about 10 minutes, and for butter, just cut it into small pieces to help it soften faster.
Grease Your Pans Generously
When it comes to greasing your baking pans, don’t be shy! Make sure to use a good amount of unsalted butter or baking spray to prevent sticking. I like to use a pastry brush to coat every nook and cranny of heart-shaped pans, ensuring a seamless release once they’re baked. Trust me, you want your beautiful cakes to come out intact!
Keep an Eye on the Baking Time
Every oven is different, so keep an eye on your treats as they bake. Start checking for doneness a few minutes before the recommended baking time. If you insert a toothpick and it comes out with moist crumbs rather than wet batter, you’re good to go! If you notice the tops are browning too quickly, you can lightly cover them with aluminum foil for the last few minutes to prevent over-baking.
Let Cakes Cool Completely
Once your cakes are out of the oven, let them cool in the pans for about 10 minutes before transferring them to a wire rack. Cooling completely is key before you decorate; otherwise, your frosting might melt right off! Plus, letting them sit for a bit allows the flavors to settle and intensify.
Get Creative with Decorations
This is the fun part! Feel free to let your creativity shine when it comes to decorating. Whether you’re using vibrant red and pink frosting, fun sprinkles, or even fresh berries, the sky’s the limit! Personalizing each dessert with different toppings will make your Valentine’s bakery even more special and memorable.
With these tips in mind, you’re well on your way to creating a delightful assortment of baked treats that will spread love and joy this Valentine’s Day. Happy baking!
Nutritional Information Section
When it comes to indulging in these delightful treats, it’s always nice to have a peek at what’s in them! Here’s the estimated nutritional breakdown for one slice of our Valentine’s Day baked goods:
- Calories: 250
- Fat: 10g
- Saturated Fat: 6g
- Unsaturated Fat: 4g
- Trans Fat: 0g
- Cholesterol: 40mg
- Sodium: 150mg
- Carbohydrates: 35g
- Fiber: 2g
- Sugar: 20g
- Protein: 3g
Keep in mind that these values are estimates and can vary based on specific brands and ingredients used. So, while you’re whipping up these delicious goodies, remember to savor them in moderation and share the love! Happy baking!
FAQ Section
As you embark on your baking adventure for this *valentines bakery*, you might have a few questions swirling around in your mind. Don’t worry, I’ve got you covered! Here are some common queries along with helpful answers to ensure your baking experience is as smooth as possible.
Can I make substitutions for any of the ingredients?
Absolutely! If you’re out of buttermilk, you can easily make your own by adding a tablespoon of vinegar or lemon juice to a cup of regular milk and letting it sit for about 5 minutes. For the butter, you could use coconut oil for a dairy-free option. Just remember, these swaps can slightly change the texture and flavor, but they’ll still be delicious!
How should I store the baked goods?
To keep your lovely treats fresh, store them in an airtight container at room temperature for up to three days. If you want to keep them for longer, you can refrigerate them for about a week or freeze them for up to three months. Just make sure to wrap them tightly in plastic wrap and then place them in a freezer bag. When you’re ready to enjoy them again, let them thaw at room temperature!
What’s the best way to decorate these treats?
Get creative! For Valentine’s Day, I love using red and pink frosting, but you can also use white chocolate ganache for a luxurious touch. Sprinkles, edible glitter, or even fresh fruits like strawberries can add a beautiful finish. You can even write sweet messages on cakes or cupcakes with icing to make them extra special!
Can I make these treats ahead of time?
Yes, you can! In fact, making them a day ahead can let the flavors meld beautifully. Just make sure to store them properly. If you’re frosting them, it’s best to wait until the day of serving to keep the frosting looking fresh and pretty.
What if I don’t have heart-shaped pans?
No worries at all! You can use regular round or square cake pans instead. Just keep in mind that the baking time might vary slightly, so keep an eye on them. If you want to get festive, you can always cut the cooled cake into heart shapes with a cookie cutter!
With these tips and answers to your burning questions, you’re all set to create a stunning and delicious array of baked goods that will surely impress your loved ones this Valentine’s Day. Happy baking and enjoy the sweet moments!
Storage & Reheating Instructions
Once you’ve whipped up a batch of these delightful Valentine’s treats, you’ll want to make sure they stay fresh for as long as possible! Here’s how to store your baked goods properly and enjoy them later.
Storing Leftovers
To keep your sweet creations tasting their best, store them in an airtight container at room temperature for up to three days. If you find that you have leftovers (which is rare, trust me!), you can refrigerate them for about a week. Just make sure they’re in a container that seals tightly to prevent any drying out. If you want to keep them for longer, freezing is a great option!
For freezing, wrap each treat in plastic wrap and then place them in a freezer bag. This adds an extra layer of protection against freezer burn. They can be frozen for up to three months. When you’re ready to indulge again, simply take them out and let them thaw at room temperature. It’s like having a little piece of Valentine’s Day waiting for you!
Reheating Tips
If you prefer your treats warm (and who doesn’t?), reheating is super easy! For individual servings, pop them in the microwave for about 10-15 seconds. Just be careful not to overdo it, or you might end up with a rubbery texture. If you have a whole cake or larger piece, you can reheat it in the oven.
To do this, preheat your oven to 350°F (175°C) and place the cake on a baking sheet. Cover it loosely with aluminum foil to prevent the top from browning too much. Warm it up for about 10-15 minutes, or until it’s heated through. This will help restore that fresh-baked taste!
With these storage and reheating tips, you’ll be able to enjoy your Valentine’s bakery delights for days to come! Happy baking and savor every delicious bite!
Print
valentines bakery: Create 5 Mouthwatering Treats Together
A delightful assortment of baked goods perfect for Valentine’s Day.
- Total Time: 50 minutes
- Yield: 12 servings 1x
Ingredients
- 2 cups all-purpose flour
- 1 cup sugar
- 1/2 cup unsweetened cocoa powder
- 1 teaspoon baking powder
- 1/2 teaspoon baking soda
- 1/4 teaspoon salt
- 1/2 cup unsalted butter, softened
- 2 large eggs
- 1 teaspoon vanilla extract
- 1 cup buttermilk
Instructions
- Preheat your oven to 350°F (175°C).
- In a bowl, mix flour, sugar, cocoa powder, baking powder, baking soda, and salt.
- Add butter, eggs, and vanilla. Mix until combined.
- Slowly add buttermilk and mix until smooth.
- Pour the batter into greased baking pans.
- Bake for 25-30 minutes or until a toothpick comes out clean.
- Let cool before decorating.
Notes
- Use heart-shaped pans for a festive touch.
- Decorate with red and pink frosting.
- Consider adding sprinkles for extra flair.
- Prep Time: 20 minutes
- Cook Time: 30 minutes
- Category: Dessert
- Method: Baking
- Cuisine: American
- Diet: Vegetarian
Nutrition
- Serving Size: 1 slice
- Calories: 250
- Sugar: 20g
- Sodium: 150mg
- Fat: 10g
- Saturated Fat: 6g
- Unsaturated Fat: 4g
- Trans Fat: 0g
- Carbohydrates: 35g
- Fiber: 2g
- Protein: 3g
- Cholesterol: 40mg
Keywords: valentines bakery